If you’re searching for a way to elevate your soap-making game, look no further. Adding clay to your melt and pour soap not only enhances its texture and appearance but also boosts its skin benefits, creating a luxurious and nourishing cleansing experience. The question is, how much clay do you add to melt and pour soap? Let’s take a look.
Add 1-2 teaspoons of dispersed clay per pound of soap base. Before mixing, disperse the clay in equal parts water or carrier oil to prevent clumping. Gradually add the dispersed clay to the melted soap base, stirring continuously for even distribution.
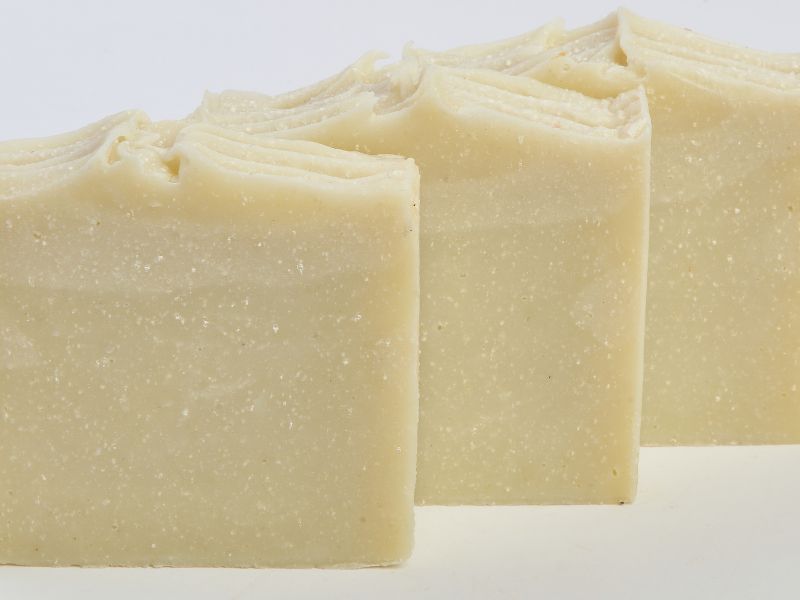
The amount of clay to add depends on the desired color and texture. For example, adding 1 teaspoon of dispersed white kaolin clay per pound of soap base will give your finished product a light tan color with a silky feel. Adding 2 teaspoons gives your soap an opaque beige hue with a matte finish. Let’s take a closer look at clay and how it works with soap.
Why Add Clay to Soap?
A wide variety of clays are used in soap making because of the benefits clay brings.
Adding clay to soap enhances its texture, appearance, and lather while providing skin benefits like detoxification, exfoliation, and improved circulation. Clay-infused soaps offer a luxurious, nourishing cleansing experience, making them ideal for self-care or gifting to loved ones.
Let’s take a look at some of the reasons clay is used in soap.
Enhancing Texture and Appearance
Incorporating clay into soap creates a delightfully rich, creamy texture, making each use feel like a pampering experience.
The fine particles found in clay give the finished soap a polished, smooth appearance that is visually appealing and pleasant to touch.
Boosting Skin Benefits
Clay is known for its numerous skin benefits, such as detoxification, exfoliation, and improved circulation.
When added to soap, it can help draw out impurities, unclog pores, and leave your skin feeling refreshed, clean, and rejuvenated.
Additionally, clay can provide gentle exfoliation, removing dead skin cells for a brighter complexion.
Improving Lather and Slip
Using clay in soap enhances its lather, resulting in a dense, creamy foam that feels luxurious on the skin. The improved lather not only creates a more enjoyable washing experience but also provides a better soap slip, allowing it to glide smoothly over the skin with minimal friction.
Types of Clay for Soap
Bentonite Clay
Sourced from volcanic ash, bentonite clay swells significantly when wet, generating a rich, luxurious lather. It is especially beneficial for oily skin types, as it effectively absorbs excess oil and removes impurities.
Kaolin Clay
Gentle and mild, kaolin clay is suitable for all skin types, including sensitive skin. Its soothing properties help alleviate irritation and inflammation without stripping away natural oils, making it ideal for maintaining skin balance.
French Green Clay
French green clay is well-known for its detoxifying properties and rich mineral content. It’s particularly suitable for oily and acne-prone skin, as it helps to remove impurities and control excess sebum production.
Its fine texture creates a smooth, silky feel when used in soap.
Rhassoul Clay
Originating from the Atlas Mountains of Morocco, Rhassoul clay is prized for its high mineral content and ability to reduce skin dryness. It works well for all skin types, promoting skin elasticity and a healthy glow.
Choosing the Right Clay
Selecting the ideal clay for your soap depends on your skin type and the specific benefits you’re seeking. Experiment with various clays and combinations to find the perfect match for your unique skin needs and preferences.
How Much Clay to Add
General Guideline for Clay Quantity
As a general rule, use 1 to 2 teaspoons of clay per pound of melt and pour soap base. This amount typically provides the desired texture and benefits without making the soap too heavy or difficult to lather.
Factors Influencing Clay Amount
The ideal clay quantity may vary depending on the type of clay, soap base, and desired outcome. The size of the soap mold and the intended use, such as facial or body soap, can also influence the amount of clay needed.
Experimenting to Find the Perfect Balance
It’s essential to experiment with different clay quantities to find the perfect balance for your specific soap. Start with a smaller amount and gradually increase it, noting the changes in texture, lather, and skin benefits.
Mixing Clay with Melt and Pour Soap
Preparing Clay for Mixing
Before mixing clay into the soap base, disperse it in a small amount of water or a carrier oil, like olive or almond oil. This step ensures the clay mixes evenly into the soap without clumping.
Melting Soap Base
Cut the melt and pour soap base into small cubes and place them in a heat-safe container. Melt the soap base using a double boiler or microwave, stirring occasionally to ensure even melting.
Incorporating Clay into the Soap Base
Once the soap base has melted, slowly add the pre-dispersed clay while stirring continuously. Mix the clay and soap base until the clay is evenly distributed throughout the mixture.
Tips for Even Dispersion
To achieve even clay dispersion, it’s important to stir the soap mixture consistently and patiently. Use a spatula or a whisk to break up any clumps that may form.
If needed, pass the mixture through a fine mesh sieve to remove any remaining lumps.
Molding and Setting Clay Soap
Selecting Appropriate Soap Molds
Choose soap molds made of silicone, plastic, or wood, depending on your preference. Silicone molds are easy to use and release soap effortlessly, while plastic and wood molds may require lining with parchment paper or plastic wrap for easy removal.
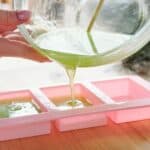
Pouring the Soap Mixture
Carefully pour the soap and clay mixture into the prepared molds, ensuring an even distribution of clay throughout the soap.
Tap the molds gently on the counter to remove air bubbles and create a smooth surface.
Cooling and Setting Process
Allow the clay soap to cool and set at room temperature, which may take several hours to overnight. For quicker results, place the molds in the refrigerator, but avoid freezing, as it may cause sweating or condensation on the soap.
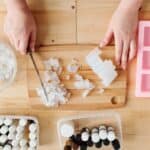
Unmolding and Cutting Tips
Once the soap has fully set, gently remove it from the mold by pressing the mold’s sides and carefully lifting the soap out.
If using a loaf mold, use a non-serrated knife or soap cutter to slice the soap into even bars.
Troubleshooting Common Clay Issues
Dealing with Clumps and Uneven Texture
If your soap has clumps or an uneven texture, ensure the clay is dispersed in water or oil before adding it to the melted soap base. Stir the mixture thoroughly, and if needed, strain it through a fine mesh sieve to remove lumps.
Preventing Clay from Settling at the Bottom
To prevent clay from settling at the bottom of the mold, pour the soap mixture at a slightly cooler temperature. Stir the mixture occasionally as it cools to maintain even clay distribution.
You can also try adding a small amount of melted soap to the mold, allowing it to set slightly, and then pouring the clay-infused mixture on top.
Handling Color Changes in Soap
Natural clays may cause slight color changes in soap over time due to their mineral content. To minimize color changes, store the finished soap in a cool, dry place, away from direct sunlight.
Embrace the uniqueness of your homemade soap, as slight color variations are part of its charm.
Frequently Asked Questions
Adding clay enhances the soap’s texture, appearance, skin benefits, lather, and slip, providing a luxurious and nourishing cleansing experience.
Ensure the clay is dispersed in water or oil before adding it to the melted soap base. Stir thoroughly, and if needed, strain the mixture through a fine mesh sieve.
Pour the soap mixture at a slightly cooler temperature and stir occasionally as it cools to maintain even clay distribution.
This guide focuses on melt and pour soap, but you can also incorporate clay into cold process soap recipes. Adjust clay quantities accordingly and follow the cold process soap-making method.
The shelf life of clay soap depends on the ingredients used, but it typically lasts 1-2 years. Store it properly to maximize its longevity.
Select a soap mold made of silicone, plastic, or wood, depending on your preference. Silicone molds are the easiest to use and release soap effortlessly.
Conclusion
In conclusion, incorporating clay into your melt and pour soap creations can transform an ordinary cleansing experience into a luxurious, skin-nourishing treat. With various clays to choose from, you can customize your soap to cater to different skin types and needs.
Experimenting with clay quantities, fragrances, and colors allows you to craft unique, personalized soaps perfect for pampering yourself or gifting to others. By following the tips and techniques outlined in this guide, you’ll be well on your way to mastering the art of making exquisite clay-infused soaps at home.