Remember the last time you bought a beautiful bar of plant-based soap from that quaint local store? The moment you took a whiff of its delicate, botanical scent, you felt instantly transported to a serene, lush garden. You loved how it’s rich lather and exfoliating grains felt on your skin, and the thought crossed your mind – could you recreate this luxurious experience at home?
Yes, you absolutely can! Making your own plant-based soap isn’t just a fun and creative activity. It also gives you control over the ingredients, allowing you to customize the scent, color, texture, and beneficial properties to your liking. Imagine the satisfaction of lathering up with a soap that’s truly yours, or the joy of gifting a bar of homemade soap to a loved one.
Now, if you’re wondering how to make plant-based soap, you’ve come to the right place. Here are the steps to take to create your own botanical bathing luxury.
Gathering Your Materials for Plant-Based Soap
Choosing a Soap Base
The foundation of your homemade soap is, of course, the soap base. For a plant-based soap, opt for a glycerin or castile soap base, both readily available online or at local craft stores. Glycerin soap is clear, allowing for more creativity with color and design, while castile soap is made from olive oil, providing extra nourishment for the skin.
Imagine you’re building a house – the soap base is like the bricks and mortar, holding everything together. You want to ensure that the base is sturdy and high-quality, as it affects the overall product.
Remember, all soap bases are not created equal. Check the ingredients to make sure there are no hidden chemicals or animal products. For truly plant-based soap, your base should be vegan and cruelty-free.
Selecting Essential Oils
Next, you’ll want to choose the essential oils that will give your soap its delightful aroma. This is where you get to customize your soap to your liking – similar to choosing the paint color for your new house.
Common choices for soap making include lavender, peppermint, tea tree, and lemongrass, but feel free to experiment. You can even combine oils to create a unique scent. For instance, mixing lavender and peppermint gives a relaxing yet invigorating aroma.
Tip: When adding essential oils, a good rule of thumb is to add about 1 ounce per pound of soap base. However, some oils are stronger than others, so adjust according to your preference.
Selecting Additives
The final materials you need for your plant-based soap are additives, which can provide texture, color, and added benefits. Examples of plant-based additives are oatmeal for exfoliation, dried flowers for aesthetics, or green tea for antioxidants.
Think of your additives like the decorations in your house. They add character, appeal, and functionality. Plus, they are what will make your soap truly unique.
When it comes to additives, less is often more. Too much can make the soap harsh or even crumbly. Start with a small amount, and increase it gradually if needed.
Preparing Your Workspace for Soap Making
Choosing a Suitable Space
Soap making, much like any craft or DIY project, requires a clear, clean workspace. Choose a flat surface in your kitchen where you have enough room to spread out your materials and tools.
You wouldn’t try to build a house on uneven ground, would you? Similarly, your workspace needs to be flat and stable. This not only makes the process easier but also safer, especially when dealing with hot soap base.
Gathering Your Tools
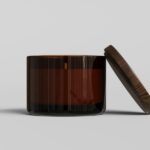
Once you’ve chosen your workspace, gather your soap base, essential oils, additives, a soap mold, a large bowl, and a microwave-safe or heatproof container. Like a craftsman with his toolbox, having everything within reach before you start makes the process smooth and enjoyable.
A tip: Silicone soap molds work well because they’re flexible and make it easy to pop out the soap once it’s hardened. Choose a shape that you love – there’s everything from simple rectangles to intricate floral patterns.
Maintaining Cleanliness
Finally, make sure your workspace, tools, and hands are clean. Any dirt or debris can end up in your soap, ruining the texture and appearance. Also, cleanliness is key to ensure that your soap has a longer shelf life. It’s akin to a cook working in a clean kitchen – it not only results in a better product but is also a more pleasant and safe process.
With your materials gathered and workspace prepared, you’re all set to start
Cutting and Melting the Soap Base
Cutting the Soap Base
The first step in the actual soap-making process is to cut your soap base into small, manageable cubes. This will help it to melt more evenly and efficiently. Think of it as preparing vegetables for a soup; you wouldn’t put a whole potato in the pot, right?
Use a sharp knife and cutting board dedicated to soap-making to chop your soap base. You don’t need precision cuts, but aim for roughly 1-inch cubes. This size is large enough to handle but small enough to melt quickly.
Melting the Soap Base
Once your soap base is cut into cubes, it’s time to melt it. Place the cubes into a heatproof container – a glass Pyrex measuring cup works well because it’s easy to pour from later. Then, you have two options: melting it in a microwave or using a double boiler.
The microwave method is quicker – just heat the soap base in 30-second intervals, stirring in between to ensure even melting. Remember, you’re looking for a liquid consistency, like a thick, hot soup.
The double boiler method takes a bit longer but gives you more control over the heat, reducing the risk of overheating. Just like melting chocolate, you want a gentle, consistent heat to prevent the soap base from burning.
Adding Your Essential Oils and Additives
Incorporating Essential Oils
After the soap base is melted, let it cool for a moment before adding your essential oils. Just like adding delicate herbs to a dish at the end of cooking, adding the oils after the soap has cooled slightly will preserve their scent and beneficial properties.
Stir the oils into the soap base gently but thoroughly. Think of it like mixing a cake batter – you want the fragrance to be evenly distributed throughout.
Mixing in Additives
Next, it’s time to stir in your chosen additives. Depending on what you choose, these will provide texture, color, and added skin benefits to your soap.
Consider what you want your soap to do. If you want an exfoliating soap, oatmeal or coffee grounds are great choices. For a soothing soap, dried lavender or chamomile would work well.
When adding your additives, stir gently but thoroughly to evenly distribute them throughout the soap. Just like adding chocolate chips to cookie dough, you want every slice (or in this case, bar) to get some of the good stuff.
A Note on Temperature
One crucial point to remember during this process is to monitor the temperature of your soap base, especially if you’ve chosen additives that might melt, like shea or cocoa butter. If the soap base is too hot, it can melt these additives and create a different consistency than intended. It’s like adding butter to hot toast – it’s going to melt.
Ideally, you want the soap base to be warm enough to allow the additives to disperse evenly but not so hot that they melt entirely. A good rule of thumb is to aim for a temperature around 120-125 degrees Fahrenheit when adding your additives.
Now that your soap mixture is complete, we move to the final stages: molding and hardening.
Pouring the Mixture into the Mold
Transferring the Soap Mixture
Once your soap mixture is ready and thoroughly combined, it’s time to transfer it to your chosen soap mold. Think of this process as similar to pouring batter into a cake pan. You want a steady hand to ensure the mixture distributes evenly in the mold.
If your soap base is in a heatproof container with a spout, you can pour directly from there. If not, a silicone spatula can be a helpful tool to scrape out the mixture.
Remember to handle your mixture carefully during this process. The soap mixture can still be quite hot, and any spillage could cause burns.
Releasing Bubbles
After pouring the soap mixture into the mold, give it a gentle tap on the countertop. This action will help release any bubbles trapped in the mixture, giving your soap a smoother finish. It’s like when you tap a cake pan to get the air bubbles out of the batter.
You can also use a spray bottle filled with rubbing alcohol to spray the top of the soap. This will pop any bubbles that have risen to the surface. Just a light misting will do the trick!
Letting the Soap Harden
Cooling Process
Once the soap mixture is in the mold, it needs to cool and harden. This process can take anywhere from a few hours to a couple of days, depending on the size and shape of your soap bars. It’s a bit like waiting for a cake to cool; it requires a little patience but is well worth the wait.
You can let your soap harden at room temperature, but if you’re in a hurry, you can also place it in the refrigerator to speed up the process. Remember not to disturb the soap during this process; moving it can cause cracks or distort the shape.
Removing from the Mold
Once the soap has fully hardened, you can remove it from the mold. If you’re using a silicone mold, this should be as simple as popping out ice cubes from an ice tray. Just turn the mold upside down and gently push on the bottom to pop the soap out.
If you find the soap is sticking, you can put it in the freezer for about 15 minutes. The cold will help contract the soap slightly, making it easier to remove from the mold.
Curing the Soap
Technically, your soap is ready to use as soon as it comes out of the mold. However, if you want a harder, longer-lasting bar, you might want to cure it. This simply means allowing it to dry out further in a cool, dry place. Just like aging a fine wine or cheese, curing soap can improve its texture and longevity.
For curing, place the soap bars on a tray or rack with plenty of airflow. Leave them to cure for about 4-6 weeks, turning occasionally to ensure even drying.
And voila! You’ve just made your very own plant-based soap. Now, isn’t that a satisfying achievement? The final product is more than just a soap; it’s a labor of love, tailored to your preferences, and a testament to your creativity. Happy soap making!
Troubleshooting Common Soap Making Problems
Soap Didn’t Harden
One common problem you might encounter in soap making is your soap not hardening as expected. This issue is similar to a cake not setting in the oven. There can be several causes for this, including not enough soap base, too much oil or additives, or a problem with the temperature during the soap-making process.
First, ensure you’re using enough soap base for the amount of soap you’re trying to make. Secondly, remember the balance between soap base, essential oils, and additives. Too many oils or additives can disrupt the soap base’s ability to solidify. Finally, pay attention to temperature. If the soap base was overheated or the oils were added when the base was too hot, it could affect the hardening process.
Soap Has a Strange Texture
If your soap has a strange texture – too crumbly, too soft, or uneven – the culprit is often the additives. Think of this like adding too many mix-ins to cookie dough; the cookies might fall apart or have a strange texture.
When using additives, start with a small amount and adjust as needed. And remember, not all additives are compatible with all soap bases, so a bit of research or experimentation might be necessary.
Soap Irritates Skin
Lastly, if your soap irritates your skin, the cause is likely either the soap base or the essential oils. Some people have sensitivities to certain oils, and some soap bases can be harsh on sensitive skin.
Always test a new essential oil on a small patch of skin before using it in soap making. And remember, even natural substances can cause irritation. When in doubt, less is more.
Frequently Asked Questions
While you can use a variety of essential oils in soap making, it’s essential to do a bit of research first. Some oils are skin-safe and suitable for soap making, while others are not. Always test a new essential oil on a small patch of skin before using it in your soap recipe.
Curing your soap bars can significantly extend their life. By allowing them to dry out for about 4-6 weeks in a cool, dry place with good airflow, the bars will harden further, making them last longer.
The lathering properties of your soap depend on the type of soap base you’re using. Some soap bases, such as those made from olive oil or other “soft” oils, produce a creamy, low lather. In contrast, bases made with coconut oil or other “hard” oils produce a fluffy, bubbly lather.
If your soap has an off-putting smell, it could be due to the essential oils becoming rancid or the soap base spoiling. Always store your ingredients properly and ensure they are not expired before using them.
Food coloring is generally not recommended for soap making because it can stain the skin and may not hold its color well. Soap-safe colorants, like mica powders or natural colorants (like turmeric for yellow or spirulina for green), are better options.
While fresh herbs can add a lovely touch to your soap, they can also introduce moisture, which can lead to mold. If you want to use herbs, it’s better to use dried ones to avoid this issue.
Conclusion
Now that you’re armed with this comprehensive guide on how to make plant-based soap, you’re ready to turn your kitchen into your personal soap-making laboratory. From gathering the perfect plant-based materials and setting up your workspace to the intricate process of melting, mixing, and molding your soap, each step is a crucial part of the journey.
Even if you encounter some common soap-making problems, don’t be discouraged. Troubleshooting is just another part of the learning process, and with time, you’ll become a pro at overcoming these minor setbacks.
Remember, the goal is not just to create a bar of soap but to enjoy the process of creation. So go ahead, dive into the world of soap-making, and create a luxurious, customized bathing experience right at home.