Combining cold process and melt and pour soap methods opens a world of creative possibilities! We will be providing detailed tips on how to mix and layer these two soap-making techniques seamlessly, along with safety precautions to ensure a successful and enjoyable experience.
You can mix cold process soap with melt and pour soap to create unique designs. Combining these methods allows for creative experimentation with embedding, layering, and blending techniques while making visually appealing and one-of-a-kind soaps.
To ensure success, it’s crucial to carefully monitor temperatures, maintain proper consistencies, and follow safety guidelines.
By mixing cold process and melt and pour soap methods, you can unleash your creativity and craft stunning, personalized soaps.
Embrace this versatile approach and elevate your soap-making skills, producing impressive soaps that are both functional and beautiful. Let’s take a closer look at whats involved with mixing these two popular soap making methods below.
Mixing Cold Process Soap with Melt and Pour Soap
Combining Techniques: Pros and Cons
Mixing cold process soap with melt and pour offers a unique soap-making experience. Combining these techniques allows you to enjoy the benefits of both methods.
Cold process soap provides a natural, customizable base, while melt and pour offers a quicker, easier process. However, there are some challenges to consider, such as different soap consistencies and curing times.
It’s important to plan your design and be patient while experimenting.
Creative Soap Making Possibilities
By mixing cold process and melt and pour, you can create stunning, multi-textured soaps. Embedding melt and pour shapes into cold process soaps or layering both methods adds visual interest and variety.
This combination allows you to play with colors, patterns, and textures, producing one-of-a-kind soaps that will impress your friends and family.
How to Mix Cold Process and Melt and Pour
Ways to Mix
There are several ways to mix cold process and melt and pour soaps:
- Embedding: Cut melt and pour soap into shapes or use molds, then place them into cold process soap batter before it hardens.
- Layering: Pour a layer of cold process soap batter, let it thicken slightly, then pour a layer of melted melt and pour soap. Repeat as desired.
- Swirling: Pour both soap mixtures simultaneously into the mold, creating a marbled effect.
- Blending: When both soaps are of similar temperature you can blend them together to create one solid soap base that utilizes the properties of both cold process and melt and pour.
How to Mix
Here are some tips for successfully mixing cold process and melt and pour soaps:
- Temperature: Ensure both soap mixtures are at similar temperatures, around 120°F, to prevent melting or uneven layers.
- Consistency: Cold process soap should be at a medium trace, thick enough to hold the melt and pour soap without sinking.
- Patience: Allow the soap to harden and cure properly. Cold process soap typically takes 4-6 weeks, while melt and pour requires only a few hours.
By following these guidelines, you can create beautiful, functional soaps that showcase the best of both soap-making techniques. Remember to have fun and let your creativity shine!
Understanding Cold Process Soap
Cold process soap is a traditional, handmade soap-making technique that involves mixing oils or fats (like olive, coconut, or palm oil) with an alkali, typically sodium hydroxide (lye), and water.
When combined, these ingredients undergo a chemical reaction called saponification, which forms soap and glycerin.
This process requires careful measurements, safety precautions (such as wearing gloves, goggles, and a mask), and patience, as the soap must cure for 4-6 weeks to reach its optimal hardness, mildness, and lather.
Benefits of Cold Process Soap
There are several benefits to using cold process soap:
- Customization: Cold process soap allows for full control over the ingredients, enabling you to choose the specific oils, colorants, and fragrances that best suit your preferences or skin needs.
- Natural and nourishing: This method often results in soap containing fewer synthetic ingredients and chemicals compared to commercially-produced soap. Additionally, it retains the natural glycerin produced during saponification, which acts as a humectant, drawing moisture to the skin and keeping it hydrated.
- Artistic expression: The cold process method allows for a wide range of artistic techniques, such as swirling, layering, and embedding, making each soap creation unique.
Understanding Melt and Pour Soap
Melt and pour soap is a pre-made, glycerin-based soap base that has already undergone the saponification process. To create your own soap, you simply melt the base in a microwave or double boiler, add colorants, fragrances, and other additives, then pour it into a mold.
This method is beginner-friendly, as it eliminates the need to handle lye and allows for a faster soap-making process. The finished product is usually ready to use within a few hours, once it has cooled and hardened.
Advantages of Melt and Pour Soap
Melt and pour soap offers several key advantages:
- Ease of use and speed: The pre-made base simplifies the soap-making process, allowing for a quicker turnaround time. There’s no need to handle lye or wait for the soap to cure for several weeks.
- Shorter curing time: Melt and pour soap is ready to use in just a few hours after it has cooled and set in the mold.
- Versatility and creativity: With a wide range of molds, colorants, and additives available, you can achieve various designs, colors, and shapes, making each soap uniquely yours.
- Consistent results: The pre-made base ensures a consistent soap texture and quality, making it easier to achieve the desired outcome, especially for beginners or those looking for a more predictable result.
Tips for Mixing Cold Process and Melt and Pour
Getting a Good Blend
Achieving a harmonious blend when mixing cold process and melt and pour soaps requires attention to detail:
- Temperature control: Monitor the temperatures of both soap mixtures, ensuring they are similar (around 120°F) to prevent issues like melting or uneven layers.
- Consistency balance: The cold process soap should reach a medium trace consistency, meaning it’s thick enough to support the weight of the melt and pour soap without it sinking or dispersing.
- Alcohol spritz: Lightly spray rubbing alcohol on the surface of each layer before pouring the next one, as this helps layers adhere and reduces the chance of separation.
Avoiding Layers Separating
To prevent layers from separating when combining cold process and melt and pour soaps, use these techniques:
- Surface texture: Use a spoon, fork, or spatula to create grooves or ridges in the previous layer, increasing surface area and providing better grip for the next layer.
- Timing: Allow the cold process soap to thicken slightly before pouring the melt and pour layer, ensuring a stronger bond between layers.
- Proper curing: Respect the curing times for each method, as rushing the process can result in layers separating after unmolding.
Embedding and Layering Techniques
Adding Cold Process Soap Pieces to Melt and Pour
Follow these steps to embed cold process soap pieces into melt and pour soap:
- Make cold process soap and allow it to cure for at least a week, ensuring it’s firm enough for embedding without distorting its shape.
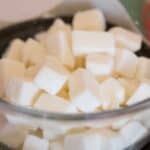
- Cut the cold process soap into shapes, cubes, or use cookie cutters or silicone molds to create various forms.
- Melt your chosen melt and pour base, and add colorants, fragrances, and other additives as desired.
- Pour a thin layer of the melt and pour soap into your mold, then carefully position the cold process soap pieces as desired.
- Gently pour the remaining melt and pour soap around and over the cold process pieces, completely filling the mold.
Layering Cold Process and Melt and Pour Soaps
Create stunning layered soaps by following these steps:
- Pour a layer of cold process soap batter into your mold, allowing it to thicken slightly to support the weight of the melt and pour layer.
- Lightly spray the cold process layer with rubbing alcohol to help the layers adhere and reduce the formation of bubbles.
- Carefully pour a layer of melted melt and pour soap over the cold process layer, ensuring similar temperatures (around 120°F) to avoid melting or uneven blending.
- Repeat steps 2 and 3, alternating between soap methods, until you achieve the desired thickness or number of layers.
Safety Tips for Soap Making
Protective Gear
Ensure your safety when making soap by wearing appropriate protective gear:
- Gloves: Use chemical-resistant gloves, such as nitrile or neoprene, to shield your hands from lye burns and skin irritation.
- Goggles: Wear safety goggles or a face shield to protect your eyes from any splashes, spills, or fumes that may occur during the soap-making process.
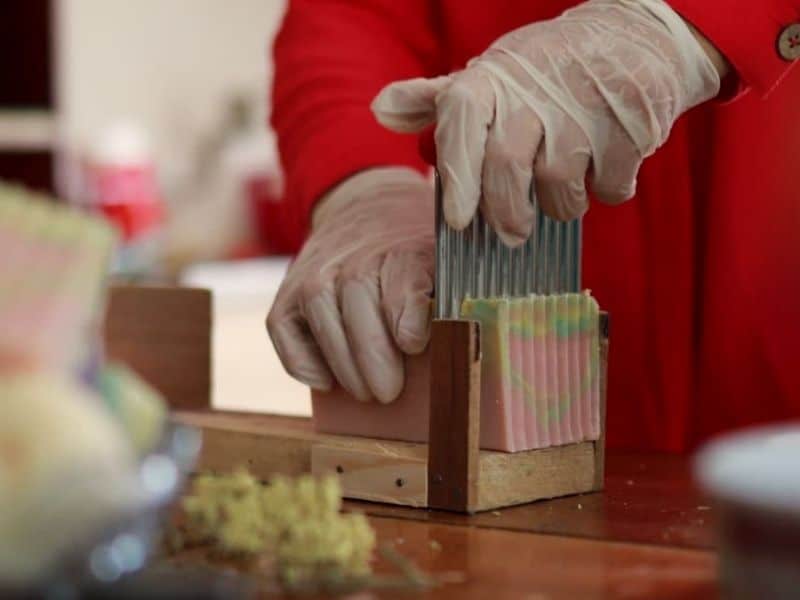
- Clothing: Don long sleeves and pants, as well as closed-toe shoes, to safeguard your skin from potential irritation or burns.
- Mask: Use a mask or respirator, especially when handling lye, to avoid inhaling harmful fumes that may cause respiratory issues.
Handling Lye Safely
Handle lye with care by following these precautions:
- Ventilation: Work in a well-ventilated area, preferably near an open window or under a vent
Frequently Asked Questions
Cold process soap is made from scratch by mixing oils, lye, and water, requiring precise measurements, safety precautions, and a curing time of 4-6 weeks. Melt and pour soap, on the other hand, uses a pre-made soap base that is melted, customized with colorants and fragrances, and poured into molds, with no lye handling and a much shorter curing time.
To achieve a good blend, monitor the temperatures of both soap mixtures, ensure the cold process soap is at a medium trace consistency, and lightly spray rubbing alcohol on the surface of each layer before pouring the next one.
To prevent separation, create surface texture on the previous layer, allow the cold process soap to thicken slightly before pouring the melt and pour layer, and respect the curing times for each method.
Create and cure cold process soap, cut it into desired shapes, melt the melt and pour base, pour a thin layer of melt and pour soap into the mold, position the cold process soap pieces, and pour the remaining melt and pour soap around and over the cold process pieces.
Pour a layer of cold process soap into the mold, let it thicken slightly, spray with rubbing alcohol, pour a layer of melted melt and pour soap, and repeat these steps, alternating between methods, until the desired number of layers is achieved.
Conclusion
In conclusion, mixing cold process and melt and pour soap offers endless opportunities for soap makers to experiment and create unique, eye-catching soaps. By understanding the fundamentals of each method and following our detailed tips, you’ll be able to blend, embed, and layer your soaps with ease.
Don’t forget to prioritize safety by wearing protective gear and handling lye with caution. Embrace your creativity and embark on a fulfilling soap-making journey that combines the best of both worlds!