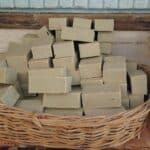
Unmolding is an essential step in creating beautiful, handcrafted soap bars. In this article, we’ll guide you through the ideal unmolding time for cold process soap, factors that can affect it, and tips for successful unmolding. So, let’s dive into the fascinating world of soap making and learn how long you should wait to unmold cold process soap.
You can unmold cold process soap after 24-48 hours. The exact time depends on factors like recipe ingredients, room temperature, humidity, and mold type. Check for firmness and edges pulling away from the mold to determine if the soap is ready to unmold.
When it comes to unmolding your cold process soap, patience is essential. Rushing the process may result in damaged or misshapen soap bars.
Adjust the waiting time based on your specific recipe and the environmental factors in your soap-making space. By paying close attention to these details, you’ll be able to create beautiful, professional-looking soap bars that release smoothly from their molds, ensuring a successful soap-making experience.
Let’s take a closer look at what is involved in unmolding cold process soap below.
Ideal Time to Unmold Cold Process Soap
Unmolding cold process soap usually takes between 24 to 48 hours. This waiting period ensures the soap is firm enough to hold its shape during the unmolding process. Keep in mind that this time frame can vary depending on a few factors, which we will explore in the next section.
Signs Soap is Ready to Unmold
To determine if your soap is ready for unmolding, try these simple tests:
- Gently press the surface of the soap. If it feels firm, and your finger doesn’t leave an indentation, it’s likely ready.
- Check if the edges of the soap have started to pull away from the mold slightly. This detachment signals that the soap has set.
Adjusting Time for Specific Recipes
Some soap recipes might require you to adjust the unmolding time. For example, softer recipes with high olive oil content can take up to 72 hours to harden. On the other hand, soap containing a higher percentage of hard oils, such as coconut or palm oil, might harden more quickly, reducing the waiting time.
Factors Affecting Unmolding Time
The ingredients in your soap recipe can impact the time it takes for the soap to harden. Recipes with high water content or a larger proportion of soft oils, like avocado or almond oil, might need more time to set before they’re ready to unmold.
The environment where your soap is setting plays a role in the unmolding time. A warmer room temperature can accelerate the hardening process, while cooler temperatures might extend the waiting period. High humidity levels can also slow down the soap’s hardening process, requiring a longer setting time.
The type and size of your soap mold can also affect the unmolding time. Silicone molds tend to release soap more easily and quickly, while wooden or plastic molds might need extra time. Additionally, larger or thicker soap bars generally require a longer setting time to ensure the soap is firm enough for unmolding.
Tools and Techniques for Unmolding
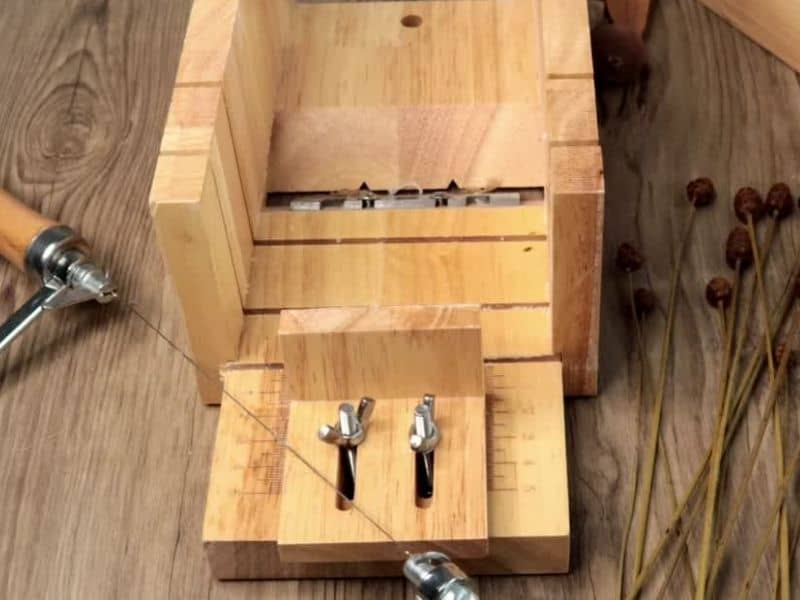
Soap Cutting Tools
Investing in a soap cutter or a sharp, non-serrated knife can make the unmolding process easier. A straight or wavy cutter helps create clean, precise cuts, ensuring your soap bars look professional.
Using Freezer or Refrigerator
Placing your soap in the freezer for 30 minutes to an hour before unmolding can make it firmer and easier to remove from the mold. For a softer soap recipe, refrigerating it for a few hours might be helpful.
Silicone Molds Advantages
Silicone molds are flexible and non-stick, making them ideal for unmolding. Their elasticity allows you to gently push the soap out without damaging it. Additionally, silicone molds don’t require lining, saving time and effort.
Tips for Successful Unmolding
Properly Preparing the Mold
Before pouring your soap mixture into the mold, prepare it correctly. For wooden or plastic molds, line them with parchment paper or plastic wrap. This helps the soap release more easily when it’s time to unmold.
Patience During the Process
Rushing the unmolding process can lead to damaged or misshapen soap. It’s essential to wait until the soap is firm enough to handle. Remember, the time needed depends on various factors discussed earlier.
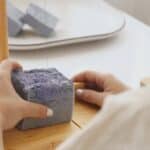
Gently Handling Soap During the Removal
When unmolding your soap, handle it with care to prevent dents or cracks. For silicone molds, gently press the sides and bottom to release the soap. For lined molds, carefully lift the lining and soap out together.
Troubleshooting Common Unmolding Issues
Soft or Sticky Soap
If your soap feels soft or sticky when you try to unmold it, it might require more time to set. Allowing it an additional 12 to 24 hours to harden can help.
For particularly soft recipes or high humidity environments, you can also try refrigerating the soap for a few hours. This helps to speed up the hardening process, making it easier to unmold without leaving residue behind.
Soap Sticking to Mold
Dealing with soap sticking to the mold can be frustrating, but there are solutions. First, always line wooden or plastic molds with parchment paper or plastic wrap to ensure easy removal. If your soap still sticks to the mold despite proper lining, place it in the freezer for 30 minutes to an hour.
This will cause the soap to contract slightly, making it easier to release from the mold. Remember to remove the soap from the freezer and let it sit for a few minutes before attempting to unmold it.
Cracked or Damaged Soap
Cracked or damaged soap typically occurs when it’s unmolded too soon or handled roughly during the removal process. To prevent this issue, confirm that the soap has set completely before attempting to unmold it.
Press the soap gently and check for any indentation before proceeding. When removing the soap, handle it with care, and use even pressure to avoid causing damage.
If your soap does crack or sustain damage, don’t worry! You can still use it for personal use, as the soap’s functionality remains unaffected. Alternatively, you can try rebatching the soap to salvage it.
Rebatching involves grating the damaged soap, adding a small amount of liquid, and heating it gently in a double boiler or slow cooker.
Once the soap has melted, you can pour it into a mold and let it set again. This process can help to create a smoother, more uniform bar of soap.
Frequently Asked Questions
To check if your soap is ready to be unmolded, gently press the surface. If it feels firm and your finger doesn’t leave an indentation, it’s likely ready. Additionally, the soap’s edges may slightly pull away from the mold, indicating it’s set.
To prevent soap from sticking to the mold, line wooden or plastic molds with parchment paper or plastic wrap. You can also place the soap in the freezer for 30 minutes to an hour before unmolding to help it release more easily.
For soft or sticky soap, allow it to set for an additional 12 to 24 hours, or refrigerate it for a few hours to speed up the hardening process.
Cracked or damaged soap can result from unmolding the soap too soon or handling it roughly during the removal process.
Silicone molds are advantageous because they’re flexible, non-stick, and easy to clean. Their elasticity allows for gentle soap removal without causing damage.
For softer soap recipes with high olive oil content, you may need to wait up to 72 hours. For recipes with a higher percentage of hard oils like coconut or palm oil, the waiting time may be shorter.
Conclusion
In conclusion, mastering the art of unmolding cold process soap is crucial for creating beautiful, professional-looking soap bars. By understanding the ideal waiting period, recognizing signs that your soap is ready to unmold, and considering factors that can affect the process, you’ll be well-prepared for a successful unmolding experience.
Remember to use the right tools, techniques, and mold preparations, and always be patient and gentle during the process. Don’t be afraid to experiment and learn from your experiences, as practice makes perfect. We hope this article has provided you with valuable insights and tips to enhance your soap making journey.