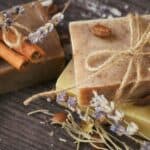
Are you looking to dive into the world of homemade soap making but feel overwhelmed by the countless methods and techniques? Fear not! We will simplify the process for you, guiding you through the most beginner-friendly soap making technique.
Melt and pour soap is the easiest soap to make because it uses pre-made soap bases, eliminating the need to handle lye or wait for curing. It’s a beginner-friendly method that offers quick results, while still allowing customization with scents, colors, and additives.
To get started with melt and pour soap, you’ll need to choose a soap base. The most popular choices are glycerin and shea butter, both of which create smooth lathers and have great moisturizing properties. You can also find other bases like goat milk or olive oil that can be used to make soaps with unique characteristics.
The Easiest Soap to Make
Introduction of The Easiest Soap To Make
In the world of homemade soap making, beginners often search for the easiest and most accessible method to create their own soaps. Melt and pour soap making stands out as the simplest technique to get started with, allowing individuals to dive into the fascinating world of natural, handmade skincare products.
Explanation of Why This Soap is The Easiest to Make
Melt and pour soap making is the easiest method because it eliminates the need to work with hazardous materials like lye and significantly reduces the curing time. This method uses pre-made soap bases, making it a beginner-friendly option that ensures quick and successful results without extensive knowledge or experience in soap making.
Discussion of The Benefits of Using This Soap
Melt and pour soaps offer numerous benefits, including:
- Chemical-free and gentle on the skin
- Customizable with various scents, colors, and additives
- Eco-friendly and cost-effective compared to store-bought soaps
- The satisfaction of creating unique, handmade skincare products
Popular Melt and Pour Soap Bases
Here are some of the most popular melt and pour soap bases:
Glycerin Soap Base
Glycerin is a natural humectant that attracts and retains moisture, making it an ideal ingredient for hydrating soaps. Clear glycerin soap bases create a transparent soap that showcases embedded objects or swirling colors, while white glycerin bases provide a more opaque appearance. Both types are gentle on the skin and suitable for all skin types.
Shea Butter Soap Base
Shea butter is derived from the nuts of the African shea tree and is prized for its moisturizing and nourishing properties. A shea butter soap base contains a high concentration of natural vitamins and fatty acids, making it an excellent choice for those with dry or sensitive skin. Its rich, creamy lather leaves the skin feeling soft and smooth.
Goat’s Milk Soap Base
Goat’s milk is known for its soothing and moisturizing properties, making it ideal for sensitive or dry skin. It’s rich in vitamins, minerals, and proteins that nourish the skin and support a healthy complexion. Goat’s milk soap base creates a creamy, luxurious lather with a subtle, natural scent.
Olive Oil Soap Base
Olive oil has long been revered for its skin-loving properties, offering hydration, antioxidants, and vitamins. An olive oil soap base is ideal for those seeking a gentle, moisturizing soap that’s suitable for all skin types. Its mild lather cleanses the skin without stripping away natural oils.
Aloe Vera Soap Base
Aloe vera is well-known for its soothing and healing properties, making it an excellent choice for those with sensitive or irritated skin. An aloe vera soap base combines the moisturizing benefits of glycerin with the calming effects of aloe, creating a gentle soap that nurtures and heals the skin.
Hemp Seed Oil Soap Base
Hemp seed oil is derived from the seeds of the hemp plant and is rich in essential fatty acids, vitamins, and minerals. A hemp seed oil soap base offers a nourishing and moisturizing cleanse, making it ideal for those with dry or mature skin. Its natural green tint adds visual appeal to the finished soap.
Melt and Pour Soap Making
Melt and Pour Soap Explained
The melt and pour method involves using a pre-made soap base, typically consisting of glycerin or shea butter, which is melted and then poured into molds. The soap can be customized with a variety of scents, colors, and additives before it is left to harden and take shape.
Pros and cons
- Easy and quick to learn: Melt and pour soap making is straightforward and requires minimal equipment, making it perfect for beginners.
- No need to handle lye: This method eliminates the need to work with lye, a hazardous material often used in other soap making techniques, making it a safer option.
- Limited control over base ingredients: Since you’re using a pre-made soap base, you have less control over the ingredients used in the base. However, there are various high-quality bases available to choose from.
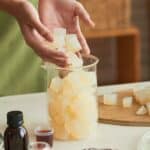
Step-By-Step Guide to Melt and Pour Soap Making
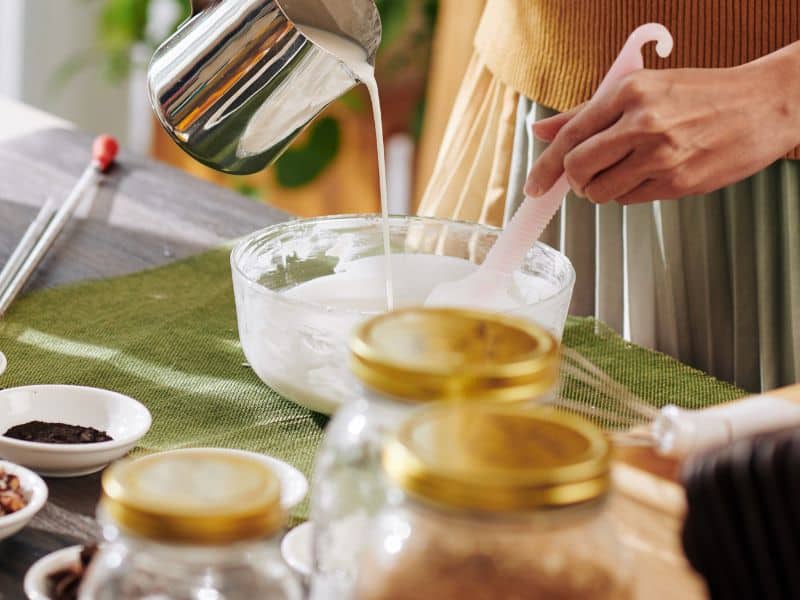
- Cut the soap base into small cubes for even melting.
- Melt the soap base in a microwave-safe bowl or double boiler, stirring occasionally.
- Once the soap base is melted, add your choice of essential oils, colorants, and additives.
- Mix the ingredients thoroughly.
- Pour the mixture into your preferred soap molds.
- Spray the top of the soap with rubbing alcohol to remove any bubbles.
- Allow the soap to cool and harden for a few hours or overnight.
- Remove the soap from the molds and enjoy your handmade creation.
Tips and Customization Ideas
- Experiment with different soap bases, such as glycerin, shea butter, or goat’s milk, to find the one that best suits your needs and preferences.
- Use natural colorants like beetroot powder, spirulina, or turmeric for vibrant, chemical-free hues.
- Add exfoliants like oatmeal, coffee grounds, or sea salt for additional skincare benefits.
- Combine various essential oils to create unique and fragrant blends.
Cost of Getting Started
Embarking on your melt and pour soap making journey requires some initial investment in equipment and supplies. However, the cost of getting started is relatively affordable, especially when compared to other soap making methods.
In this section, we’ll break down the costs associated with essential equipment, soap bases, and other additives like fragrances, colors, and exfoliants.
Equipment for Making Soap
- Soap molds: You’ll need molds to shape your soap. These can be made of silicone or plastic and come in various shapes and sizes. Prices range from $5 to $20, depending on the design and material.
- Microwave-safe bowl or double boiler: A bowl or double boiler is needed to melt your soap base. Most people already have a suitable bowl at home, but if you need to purchase one, it should cost around $5 to $15.
- Spoon or spatula: A spoon or spatula is necessary for stirring and mixing the ingredients. Prices are usually between $1 and $10.
- Rubbing alcohol in a spray bottle: Rubbing alcohol helps eliminate bubbles on the surface of your soap. A bottle of rubbing alcohol costs around $1 to $3, and a spray bottle can be purchased for $1 to $5.
Total cost for equipment: $12 – $53
Melt and Pour Soap Base
The cost of the melt and pour soap base varies depending on the type and quantity you purchase. Glycerin, shea butter, and goat’s milk bases are popular choices.
Typically, soap base prices range from $10 to $30 per 2 lbs (approximately 907 grams).
Keep in mind that the amount of soap base you buy will directly affect the number of soaps you can produce.
Cost of Additives
Fragrance
Essential oils are commonly used to add fragrance to melt and pour soaps. Prices vary depending on the type and quality of the oil. A small bottle of essential oil can cost between $5 and $15.
Color
Natural colorants like beetroot powder, spirulina, or turmeric can be used to color your soaps. These typically cost around $5 to $10 per package.
Exfoliants
Adding exfoliants like oatmeal, coffee grounds, or sea salt can enhance the texture and skincare properties of your soap. Prices for exfoliants range from $1 to $10, depending on the type and quantity.
Total cost for additives: $11 – $35
The overall cost of getting started with melt and pour soap making ranges from approximately $33 to $118. This includes essential equipment, soap base, and various additives like fragrances, colors, and exfoliants.
The affordability and simplicity of melt and pour soap making make it an attractive and accessible option for beginners looking to create their own natural, handmade skincare products.
As you gain experience and confidence in your soap making skills, you can experiment with different bases, additives, and techniques to further personalize your creations.
Frequently Asked Questions
No, the melt and pour method uses pre-made soap bases, which do not require handling lye.
It generally takes a few hours to complete the melt and pour process, including melting the soap base, adding additives, pouring the mixture into molds, and allowing it to harden.
Yes, you can customize your soap by adding various scents, colors, and additives like exfoliants and botanicals.
Yes, melt and pour soap bases are generally gentle and suitable for sensitive skin. Choose a base with soothing and moisturizing properties, such as shea butter or goat’s milk, for optimal results.
Conclusion
In conclusion, melt and pour soap making is the easiest and most beginner-friendly method to create homemade soaps. This technique offers a hassle-free experience, as it eliminates the need to handle lye and significantly reduces the curing time. The affordability and accessibility of melt and pour soap making make it a perfect starting point for those looking to explore the world of natural, handmade skincare products.
As you become more experienced and confident in your soap making skills, you can continue to experiment with different bases, additives, and techniques to create truly one-of-a-kind soaps that cater to your personal preferences and skincare needs.