Are you an aspiring soap maker or maybe you’re a seasoned pro looking for new ways to expand your creative horizons? Have you wondered if mixing different melt and pour soap bases is possible? We are going to take a look at mixing MP soap bases and why you might want to do it.
You can mix melt and pour soap bases to create unique textures, colors, and designs. Successfully combining melt and pour soap bases requires proper melting, stirring, and temperature monitoring for a smooth, high-quality result.
Mixing melt and pour soap bases allows you to customize soaps to suit your preferences or create a one-of-a-kind soap. Experimenting with various combinations opens up endless possibilities for creative designs and textures.
To ensure success in your soap-making journey, remember to follow recommended guidelines for melting, stirring, and monitoring temperatures. Let’s take a closer look at mixing soap bases and what you need to know about how to do it.
Mixing Melt and Pour Soap Bases
Reasons to mix soap bases bases
Mixing melt and pour soap bases allows for endless creativity. By combining different bases, you can create unique textures, colors, and designs.
Not only does this make your soaps stand out, but it also lets you personalize them for specific needs or preferences. For instance, you can blend a moisturizing base with a clear base to achieve a balance between hydration and clarity.
If you want to add special features or colorants to your soaps, mixing melt and pour bases is the way to go. You can easily customize different types of oils, exfoliants, and natural additives into your soaps by adding them once the bases have melted.
We have some tips for you to help you successfully mix the soap bases.
Tips for successfully mixing soap bases
- Test compatibility: Before mixing bases, test a small amount to ensure they blend well. This helps avoid wasted ingredients and time.
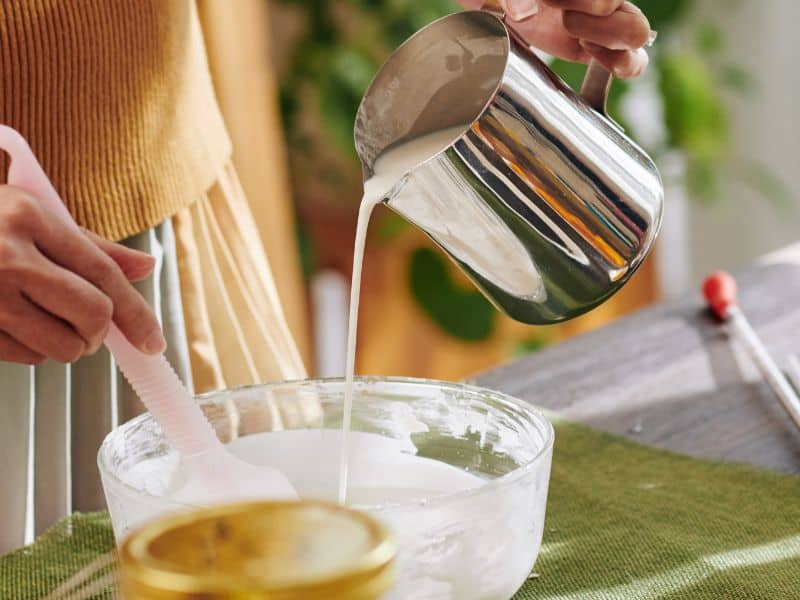
- Melt separately: Melt each base individually, then combine them when both are in a liquid state. This ensures a smooth mixture.
- Use a double boiler: A double boiler gently melts the soap without overheating or burning it, leading to a better outcome.
- Stir gently: When mixing, avoid introducing air bubbles. Stir slowly and gently for a smooth finish.
- Monitor temperature: Use a thermometer to ensure both bases are at similar temperatures before combining.
Understanding Soap Bases
Clear base
A transparent base that’s perfect for creating colorful and decorative soaps.
White base
Opaque and creamy, this base is great for pastel colors and a more traditional appearance.
Shea butter base
A moisturizing option that’s enriched with shea butter, ideal for dry or sensitive skin.
Goat’s milk base
Rich in nutrients and gentle on the skin, this base is perfect for those seeking extra nourishment.
Olive oil base
This base is infused with olive oil, providing a luxurious feel and beneficial properties.
Glycerin base
A humectant that attracts moisture to the skin, glycerin-based soaps help keep skin hydrated.
Each melt and pour soap base has unique characteristics that cater to different needs and preferences.
Clear and white bases offer versatility in color and design, while shea butter, goat’s milk, and olive oil bases provide added nourishment for various skin types.
Glycerin bases, on the other hand, help retain moisture, making them an excellent choice for those with dry skin. By understanding the differences and benefits of each base, you can make informed decisions when creating your own soap blends.
Creative Soap Combinations
Unique base mixes and effects
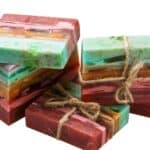
- Layered soaps: Combine clear and white bases for a striking contrast. Create alternating layers or even diagonal designs for added visual interest.
- Marbled effect: Mix a colorful base with a white base to create a marbled appearance. Swirl the colors gently for a stunning effect.
- Dual-purpose soap: Combine a moisturizing base (e.g., shea butter) with an exfoliating base (e.g., one containing oatmeal) for a soap that both nourishes and cleanses.
- Embedded designs: Use clear bases to encase smaller soap pieces, creating a “floating” effect for an eye-catching look.
Case studies for inspiration
- Lemon Lavender Swirl: A mix of white and clear bases with a beautiful swirl of lemon and lavender colors, scented with essential oils.
- Ocean Waves: A multi-layered soap with shades of blue and white, resembling ocean waves, using clear and white bases.
- Rose Gold Delight: A combination of shea butter and clear bases with a luxurious rose gold mica swirl for an elegant touch.
Advanced Techniques for Mixing Bases
Layering and swirling techniques
- Layered soaps: Pour one base layer into a mold, let it set slightly, then gently pour another base on top. Repeat as desired.
- Swirled soaps: Pour two or more bases into a mold at the same time. Use a skewer or toothpick to create intricate swirl patterns.
- Gradient effect: Start with a dark-colored base, gradually add a lighter-colored base, and mix gently to create a smooth transition between colors.
Embedding shapes and objects
- Soap cutouts: Use cookie cutters or soap molds to create shapes from one base. Embed these shapes into a different base for a striking design.
- Soap curls: Create thin sheets of soap and curl them before embedding them into a contrasting base for an interesting texture.
- Embedded treasures: Encase small, skin-safe items (e.g., plastic toys, loofahs, or pumice stones) within clear bases for a fun and functional surprise.
Experiment with these creative combinations and advanced techniques to create unique and personalized soaps that are both visually appealing and beneficial for the skin.
Troubleshooting Common Issues
Addressing mix compatibility
- Separation: If bases don’t mix well, try heating them to similar temperatures before combining, or choose more compatible bases.
- Hardening too fast: Work quickly when combining bases, as some may solidify faster than others. Have all ingredients and tools ready beforehand.
- Uneven texture: If your soap has a grainy or uneven texture, reheat and mix thoroughly to ensure a smoother consistency.
Solutions for a smooth soap making process
- Keep a clean workspace: Clean all tools and surfaces to prevent contamination and ensure a high-quality final product.
- Use proper measurements: Accurately measure your ingredients to achieve the desired consistency and effectiveness.
- Follow recommended temperatures: Stick to suggested heating and cooling temperatures for each base to prevent overheating or premature hardening.
Safety Precautions
Proper handling and storage
Use gloves and goggles
Protect your hands and eyes from hot soap and potential irritants by wearing gloves and safety goggles.
Ventilation
Work in a well-ventilated area to avoid inhaling fumes from melting soap or added fragrances.
Safe storage
Store soap bases and finished soaps in a cool, dry place, away from direct sunlight and moisture, to maintain quality.
Label containers
Clearly label containers to avoid confusion and prevent accidental ingestion or misuse of ingredients.
Importance of following instructions
Manufacturer guidelines
Follow the instructions provided by the soap base manufacturer to ensure proper melting and mixing.
Allergen awareness
Be aware of potential allergens in ingredients and inform users of any risks, especially when gifting or selling your soaps.
Test new ingredients
When using new additives, perform a small test batch to ensure compatibility and desired results.
By troubleshooting common issues and adhering to safety precautions, you can create beautiful, high-quality soaps while maintaining a safe and enjoyable soap making experience.
Frequently Asked Questions
While many melt and pour soap bases can be mixed, it’s crucial to test their compatibility first. Some bases may not blend well, leading to separation or inconsistent textures.
Melt a small amount of each base separately and then combine them. Observe how they blend and set to determine if they’re compatible with your project.
Layered soaps, marbled effect soaps, dual-purpose soaps, and embedded designs are a few examples of creative soap combinations using mixed bases.
Pour two or more bases into a mold simultaneously, then use a skewer or toothpick to create intricate swirl patterns.
Embedding shapes or objects in soap adds visual interest, texture, and sometimes additional functionality, such as exfoliation or massage.
Conclusion
In conclusion, you can mix melt and pour soap bases and it opens up a world of endless creativity and personalization. By understanding the characteristics and benefits of each base, following tips for successful mixing, and exploring creative combinations and techniques, you can craft unique and visually appealing soaps tailored to various skin needs.
As you embark on this exciting soap-making journey, remember to troubleshoot common issues and prioritize safety precautions to ensure a smooth, enjoyable experience.