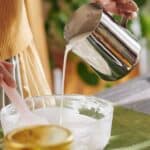
One of the most popular methods of making melt and pour soap involves layering different colors and textures to create stunning, eye-catching soaps. However, a common challenge faced by soap makers is keeping these layers from separating. In this article, we’ll dive into the common reasons for layer separation and provide detailed tips on how to prevent it.
Prevent melt and pour soap layers from separating by maintaining proper temperature, allowing sufficient cooling time, using compatible soap bases, and spraying rubbing alcohol between layers. Ensure optimal layer thickness and follow troubleshooting tips if separation occurs.
Preventing layer separation in melt and pour soaps requires patience and attention to detail. By consistently following the guidelines outlined in this article, you’ll improve your soap making skills and produce beautifully layered creations.
As you gain experience, explore new techniques and designs to elevate your soaps, making them truly unique. Don’t be afraid to experiment and learn from any challenges encountered along the way. Remember, practice makes perfect, and soon you’ll be crafting impressive, well-bonded layered soaps to share with friends and family or to sell at your local market.
Let’s take a look at some of the common reasons for layer separation and what you can do to prevent it from happening.
Common Reasons for Layer Separation
Inadequate soap temperature
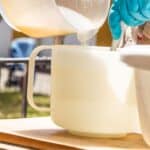
Melt and pour soap layers may separate if the soap temperature isn’t right. Ideally, the soap should be at least 130°F. If it’s too cool, the new layer won’t stick to the previous layer, leading to separation.
If it’s too hot, the new layer might melt the layer beneath it, causing them to mix or separate. To maintain the correct temperature, use a thermometer and monitor the soap during the melting process.
Insufficient cooling time
Allowing enough time for each layer to cool and set is essential for preventing separation. If you pour a new layer too soon, the layers may blend together or separate due to insufficient bonding.
To ensure proper bonding, wait until the layer is firm to the touch but still slightly tacky before pouring the next layer.
Incompatible soap bases
Combining different soap bases in a single project can cause separation if they don’t bond well with each other.
Some soap bases might have varying melting points or compositions that make them incompatible.
To avoid this issue, use the same soap base for all layers or research and test the compatibility of different bases before starting your project.
Overly thin layers
Creating layers that are too thin may result in separation because they might not have the strength to support the weight of the layers above.
To prevent this, pour layers that are thick enough to ensure stability and support for your soap design.
Tips for Preventing Separation
Choosing the right soap base
Selecting a suitable soap base is key to successful layering. Look for soap bases specifically designed for melt and pour projects, which often have better bonding properties.
Sticking to one type of soap base throughout your project can also help ensure compatibility between layers.
Ensuring proper temperature control
Keeping a close eye on the soap’s temperature is crucial for layer adhesion. Monitor the temperature with a thermometer, aiming for the optimal range of 120°F to 130°F.
This will ensure that the layers bond together properly and reduce the risk of separation.
Allowing layers to cool and set
Patience is essential when it comes to allowing layers to cool and set.
Giving each layer enough time to firm up will create a strong bond between the layers, minimizing the chances of separation.
As a rule of thumb, wait until the layer is firm but still slightly tacky before adding the next layer.
Using a spray of rubbing alcohol
A helpful tip for better layer adhesion is to spray a light mist of rubbing alcohol on the surface of each layer before pouring the next one.
This helps eliminate air bubbles and promote better bonding between layers, reducing the likelihood of separation.
Maintaining optimal layer thickness
Finding the right balance between layer thickness is essential for preventing separation. Layers that are too thin may not provide adequate support for your soap design, leading to separation.
Experiment with different thicknesses to find the best balance for your specific project and design.
Troubleshooting Layer Separation
Identifying the cause
To address layer separation in your melt and pour soaps, start by pinpointing the root cause.
Reflect on your process and assess whether the soap temperature was too high or too low, the cooling time was insufficient, the soap bases were incompatible, or the layers were too thin. Identifying the cause allows you to implement the appropriate solution.
Fixing separated layers
If your soap layers have separated, follow these detailed steps to fix the issue:
- Gently remove the separated layers using a thin spatula or knife.
- Wipe the surfaces of both layers with a damp cloth or paper towel to remove any debris or residue.
- Reheat each layer individually in a microwave or double boiler, ensuring they reach the optimal temperature of 120°F to 130°F.
- Spray rubbing alcohol on the surfaces of both layers to encourage adhesion and remove any lingering air bubbles.
- Carefully align and join the layers, ensuring they’re properly positioned.
- Apply gentle pressure to the layers to help them bond together.
- Allow the soap to cool and set before unmolding or cutting.
Adjusting techniques for future projects
Learn from your experiences and refine your techniques for future melt and pour projects.
Maintain the recommended temperature range, give each layer enough time to cool and set, use soap bases known to be compatible, and ensure your layers have the proper thickness.
Implementing these improvements will result in beautiful, well-bonded layered soaps.
Creative Layering Techniques for Melt and Pour Soaps
Swirling and marbling
Swirling and marbling techniques add captivating designs to your layered soaps.
To achieve this effect:
- Melt two or more colors of soap base, ensuring they are within the recommended temperature range.
- Pour the colored soap bases into a single mold, either simultaneously or sequentially.
- Use a skewer, toothpick, or a narrow silicone spatula to gently swirl the colors together, creating intricate patterns.
- Experiment with different swirling motions and color combinations to develop unique and eye-catching designs.
Embedding objects
Incorporating small objects into your melt and pour soap adds visual interest and a personal touch.
Consider these ideas for embeds:
- Small soap pieces in different shapes and colors.
- Non-toxic, waterproof toys or trinkets that can withstand the heat of the melted soap base.
- Natural elements such as dried flowers, herbs, or small seashells.
To embed objects, position them on a cooled layer and carefully pour the next layer of soap, ensuring the object remains in place and is fully encapsulated.
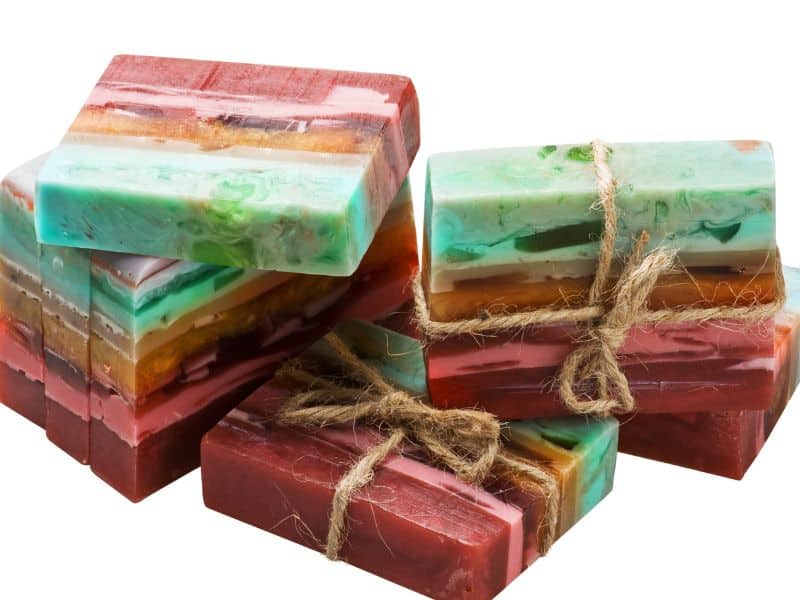
Stacking and layering colors
Layering different colors creates visually striking soaps.
Follow these tips for stacking and layering colors:
- Choose complementary or contrasting colors for a dynamic look.
- Pour each layer, allowing it to cool and set before adding the next one.
- Experiment with varied layer thicknesses, alternating between thin and thick layers for a more complex appearance.
- Create diagonal, zigzag, or striped patterns by tilting your mold or using a spatula to manipulate the soap as it cools.
- Combine different techniques like marbling and stacking to produce truly one-of-a-kind soaps.
Frequently Asked Questions
Layer thickness is important because overly thin layers might not have enough strength to hold together, resulting in separation.
Spraying rubbing alcohol between layers helps remove air bubbles and encourages better adhesion between the layers.
Swirling and marbling, embedding objects, and experimenting with different stacking patterns can enhance the appearance of your layered soaps.
To ensure compatibility, use the same soap base for all layers or research and test different bases before starting your project.
Pour two or more colors of soap base into a single mold and use a skewer or toothpick to gently swirl the colors together.
Tilt your mold or use a spatula to manipulate the soap as it cools to create diagonal, zigzag, or other intricate patterns.
Yes, combining different techniques like marbling, embedding objects, and stacking colors can create a truly one-of-a-kind soap design.
Conclusion
In conclusion, creating stunning and well-bonded melt and pour layered soaps is achievable by paying close attention to temperature, cooling time, soap base compatibility, and layer thickness.
By following our guidelines, troubleshooting tips, and experimenting with creative layering techniques, you’ll be well on your way to mastering the art of melt and pour soap making.
As you continue to practice and learn, your skills will improve, allowing you to craft beautiful, unique soaps that will impress your friends, family, or even customers. Embrace the process, and remember that practice makes perfect.