Melt and pour soap is a great way to make your own soaps without having to use a complicated process. But did you know that it’s also possible to make whipped melt and pour soap? It is a great way to create a beautiful and eye-catching product with minimal effort. Let’s take a closer look at what whipped melt and pour soap is, why it’s beneficial, how to make it at home, and some ideas for incorporating it into your projects.
Yes, you can whip melt and pour soap by using a mixer while the soap base is still at a relatively high temperature. While using the mixer slowly add in your additives and it will incorporate air bubbles into the mixture and create a creamy whipped texture.
Once the desired texture is reached, it’s time to pour your soap into the desired molds or containers and let it cool. When the soap has cooled, you will have a unique and one-of-a-kind product that looks beautiful and luxurious. Let’s take a look at the specifics!
How to Whip Melt and Pour Soap
In this guide, we will walk you through the steps of whipping melt and pour soap to create a fluffy and luxurious soap that will leave your skin feeling soft and refreshed.
Step 1: Gather the necessary ingredients
Select your preferred melt-and-pour soap base, which can be found in most craft stores or online. There are many types of soap bases available, including clear, white, shea butter, goat milk, and more.
Choose a soap base that suits your preferences and the intended purpose of your soap creation. You will also need some distilled water, fragrance oil, preservatives, and coloring of your choice.
Step 2: Melt the soap base
Cut the soap base into small cubes and place them in a microwave-safe bowl. Heat the soap base in the microwave in 30-second intervals until it is completely melted. Stir the soap base between intervals to ensure that it melts evenly.
Step 3: Add color and fragrance
Once the soap base is fully melted, add your desired color, preservative, and fragrance to the soap. Use a soap-safe colorant to tint the soap, and add a few drops of essential oil or fragrance oil to give the soap a pleasing scent. Mix the color and fragrance into the soap base thoroughly.
Step 4: Cool the soap
Allow the soap to cool to around 120°F before whipping. This temperature is important to prevent the soap from melting again when whipped. You can use a thermometer to check the temperature of the soap.
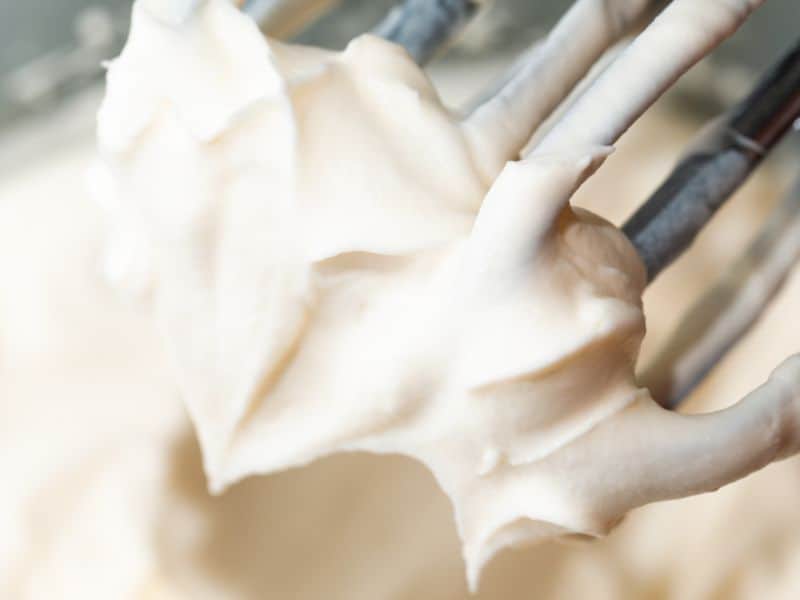
Step 5: Whip the soap
Use a hand mixer or stand mixer to whip the soap until it becomes light and fluffy. Start at a low speed and gradually increase the speed until the soap forms soft peaks. This should take around 3-5 minutes, depending on the type of mixer used.
Step 6: Pour the soap
Pour the whipped soap into your desired containers. You can use jars, cups, or other containers or molds, depending on your preferences.
Step 7: Let the soap harden
Allow the soap to cool. This can several hours, depending on the size and shape of the soap. Once the soap is fully cooled, you can enjoy your fluffy and luxurious soap creation.
Follow these easy steps and you can make fluffy and luxurious soap that is perfect for gift-giving or personal use. Experiment with different soap bases, colors, and fragrances to create your own unique soap creations.
Benefits of Whipping Melt and Pour Soap
Whipped melt and pour soap offers a range of benefits for the skin and the senses. Here are some of the key benefits of whipped melt and pour soap:
Easy to make
Whipped melt and pour soap is made by melting down a premade soap base and whipping it until it becomes light and fluffy. This process is easy and doesn’t require any specialized equipment or ingredients.
Customizable
Whipped melt and pour soap can be customized with a range of colors, fragrances, and other additives, such as exfoliants or moisturizers. This allows you to create unique and personalized soap creations that suit your preferences and needs.
Moisturizing
Whipped melt and pour soap is often made with moisturizing ingredients, such as shea butter, coconut oil, or glycerin, which can help to hydrate and nourish the skin. This makes whipped melt and pour soap a great choice for people with dry or sensitive skin.
Gentle
Whipped melt and pour soap is generally gentle on the skin, making it a good option for people with sensitive or allergy-prone skin. The soap base is pH balanced and doesn’t contain harsh chemicals, such as sulfates or parabens.
Cleansing
Whipped melt and pour soap is effective at cleansing the skin and removing dirt, oil, and impurities. The soap lathers well and can be used on the face, body, and even as a shampoo.
Aromatherapy benefits
Whipped melt and pour soap can be scented with essential oils or fragrance oils, which can offer aromatherapy benefits, such as relaxation or invigoration. The scent of the soap can also linger on the skin for hours after use.
Tips for Making the Perfect Whipped Soap
Here are some tips for making the perfect whipped soap:
Use a quality soap base
The soap base is the foundation of your whipped soap, so it’s important to choose a high-quality base that is suitable for your skin type and preferences. Look for a soap base that is free from harsh chemicals and additives, and choose a base that is designed for whipping, such as a shea butter or goat milk soap base.
Measure your ingredients carefully
Accurately measuring your ingredients is crucial to achieving the right consistency and texture for your whipped soap. Use a digital scale to weigh your ingredients, and follow the recipe or guidelines closely.
Whip at the right temperature
Whipping the soap at the right temperature is important to achieve the desired texture and prevent the soap from melting or separating. For most soap bases, the ideal temperature for whipping is between 110-130°F.
Use a hand mixer or stand mixer
Whipping soap by hand can be time-consuming and tiring, so it’s recommended to use a hand mixer or stand mixer to speed up the process and ensure even and consistent whipping.
Add your additives at the right time
If you’re adding colorants, fragrance oils, or other additives to your whipped soap, it’s important to add them at the right time. For example, add colorants before whipping, and fragrance oils while whipping to prevent the scent from dissipating.
Whip until you reach the right consistency
Whipping soap is a delicate process that requires patience and attention. Whip the soap until you reach the desired consistency, which should be light and fluffy with soft peaks.
Pack and store your whipped soap properly
Once you’ve whipped your soap, pack it into containers and store it in a cool, dry place away from direct sunlight. Proper storage will help to preserve the texture and scent of your whipped soap.
Troubleshooting Common Problems with Whipping Soap
Whipping melt and pour soap can come with its own set of challenges. Here are some common problems you may encounter when whipping melt and pour soap, and how to troubleshoot them:
Soap is not whipping
If your soap is not whipping, it could be due to a few reasons. First, make sure that the soap is at the correct temperature before whipping. Second, check that you are using the correct mixing tool for the job, Last, make sure that you haven’t added too many additives.
Soap is separating
If your soap is separating, it could be due to overheating or over-whipping. To prevent this, make sure that you are not overheating the soap base before whipping, and be careful not to overwhip the soap.
Soap is too hard or too soft
If your soap is too hard or too soft, it could be due to the soap base used. Different soap bases have different textures, so it’s important to choose the right one for your project. Alternatively, it could be due to inaccurate measurement of ingredients or under-mixing.
Soap is grainy
If your soap has a grainy texture, it could be due to over-whipping, adding additives at the wrong time, or using too many additives. Be sure to follow the recipe closely, and avoid over-whipping the soap.
Remember to be patient and experiment with different techniques and ingredients to achieve the desired results.
Frequently Asked Questions
Some common additives used in whipped melt and pour soap include colorants, fragrance oils, exfoliants, and botanicals.
To add color to whipped melt and pour soap, you can use liquid or powder colorants. It’s important to add the color before whipping the soap to ensure even distribution.
Yes, you can use essential oils in whipped melt and pour soap, but it’s important to use them in small amounts and choose oils that are safe for skin use.
Yes, you can use exfoliants in whipped melt and pour soap, such as sugar, salt, or ground coffee. Be sure to add the exfoliant after whipping the soap to avoid over-exfoliation.
The amount of fragrance oil to use in whipped melt and pour soap depends on the specific fragrance and soap base used. As a general rule, it’s recommended to use no more than 3-5% fragrance oil based on the weight of the soap base.
Conclusion
In conclusion, melt-and-pour soap can be whipped, and whipping melt and pour soap is a great way to create fun soaps with customized textures, colors, and scents. With the right ingredients, tools, and techniques you can whip up beautiful batches of whipped soap in no time! Keep these tips in mind when whipping your own melt and pour soap to ensure successful results.