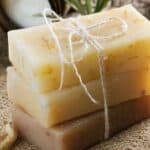
Cold process and hot process soap are two of the most popular techniques, but it’s essential to understand their differences, advantages, and disadvantages. In this article, we are going to look at cold process and hot process soap making to help you decide the best method for your needs.
Cold process soap boasts a smooth texture and allows for more customization, but requires a longer curing time. Hot process soap cures faster with a rustic appearance but offers limited creative options. Choosing the best method for you will depend on personal preference.
When making the choice between cold process and hot process soap you need to consider factors such as the time you’re willing to invest, your desired level of creativity, and the type of soap you’d like to produce.
Both cold and hot process methods have their own unique benefits and challenges. By examining each method closely, you’ll gain insight into their respective processes, ingredients, and equipment.
This information will allow you to make an informed decision and, ultimately, help you create beautiful, nourishing soaps tailored to your preferences and needs. Embrace the adventure of soap making, and discover the endless possibilities that come with it.
Let’s take a look at the basics about both cold process and hot process soap before we dig further into the comparisons of each.
Cold Process Soap
Cold process soap making is a popular method that involves mixing oils and lye solution at the right temperature. This method relies on the natural heat generated during the saponification process, which transforms oils and lye into soap. Once poured into molds, the soap hardens over time.
Advantages of Cold Process Soap
- Smooth and creamy texture: Cold process soaps have a polished appearance, making them visually appealing.
- Customizable: You can easily add colors, scents, and additives to create unique soaps.
- Longer shelf life: These soaps can last longer due to a slower oxidation process.
- Better for sensitive skin: Cold process soaps tend to be gentler and more moisturizing.
Disadvantages of Cold Process Soap
- Longer curing time: It takes 4-6 weeks for the soap to fully cure, requiring patience.
- Lye handling: Working with lye can be dangerous if not done with caution.
- More prone to errors: Mistakes in measuring or mixing can lead to failed batches.
Typical Ingredients and Equipment
- Oils: Olive, coconut, and palm oil are common choices.
- Lye solution: A mixture of sodium hydroxide and water.
- Additives: Essential oils, colorants, and exfoliants for customization.
- Equipment: Accurate scale, thermometer, stick blender, and soap molds.
Hot Process Soap
Hot process soap making also involves mixing oils and lye solution, but it adds an extra step: heating the mixture. This speeds up saponification, allowing the soap to be ready sooner. After cooking, the soap is spooned into molds to cool and harden.
Advantages of Hot Process Soap
- Faster curing time: The soap can be used within a week of making.
- More rustic appearance: Some people prefer the natural, homemade look.
- Easier to control trace: The cooking process helps thicken the soap, making it easier to work with.
Disadvantages of Hot Process Soap
- Less smooth texture: The soap may have a more uneven or rough appearance.
- Limited customization: Colors and scents can be affected by the heat, making it harder to achieve desired results.
- More equipment needed: A slow cooker or double boiler is required for heating the soap mixture.
Typical Ingredients and Equipment
- Oils: Similar oils to cold process, like olive, coconut, and palm oil.
- Lye solution: A mixture of sodium hydroxide and water, as in cold process.
- Additives: Essential oils, colorants, and exfoliants can still be used but may require adjustments.
- Equipment: Slow cooker or double boiler, scale, thermometer, stick blender, and soap molds.
Comparing Cold Process and Hot Process Soaps
Cold process soaps have a smooth and creamy texture, making them visually appealing. They can also be easily molded into intricate designs. In contrast, hot process soaps have a more rustic, homemade appearance, with a slightly rougher texture due to the heating step.
Curing Time and Shelf Life
Cold process soaps require a longer curing time, typically 4-6 weeks, allowing them to harden and develop a longer shelf life. Hot process soaps cure faster, often within a week, but may not last as long due to a quicker oxidation process.
Suitability for Different Skin Types
Cold process soaps tend to be gentler and more moisturizing, making them suitable for sensitive skin. However, both methods can create soaps with skin-friendly ingredients. It’s important to choose the right oils and additives for the desired skin benefits.
Ease of Customization and Creativity
Cold process soap making offers more opportunities for customization and creativity, as colors, scents, and additives blend more easily. Hot process soaps can still be customized, but the heating step may affect some ingredients, making it more challenging to achieve the desired result.
Cold Process vs Hot Process Methods: Step By Step
In this section, we’ll provide a brief step-by-step overview of both cold process and hot process soap making methods, highlighting the differences between the two techniques.
This will help you understand what is involved and required of each method to help you choose what method is right for you.
Cold Process Method:
- Prepare your workspace: Set up a clean, well-ventilated area with all your ingredients, equipment, and safety gear ready.
- Measure and mix your lye solution: Carefully weigh and mix the sodium hydroxide with water. Set aside to cool.
- Weigh and heat your oils: Measure the oils according to your recipe and gently heat them to the recommended temperature.
- Combine the lye solution and oils: Once both mixtures reach the same temperature, slowly pour the lye solution into the oils while stirring.
- Blend to trace: Use a stick blender to mix until the soap reaches trace, indicating proper emulsification.
- Customize your soap: Add colors, scents, and other additives to the soap mixture.
- Pour into molds: Carefully pour the soap into your desired molds.
- Insulate and let it set: Cover your molds and allow the soap to harden for 24-48 hours.
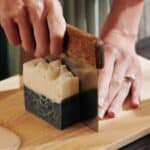
- Unmold and cut: Remove the soap from the molds and cut it into bars.
- Cure the soap: Place the soap bars on a rack in a well-ventilated area to cure for 4-6 weeks.
Hot Process Method:
- Prepare your workspace: Set up a clean, well-ventilated area with all your ingredients, equipment, and safety gear ready.
- Measure and mix your lye solution: Carefully weigh and mix the sodium hydroxide with water. Set aside to cool.
- Weigh and heat your oils: Measure the oils according to your recipe and gently heat them to the recommended temperature.
- Combine the lye solution and oils: Once both mixtures reach the same temperature, slowly pour the lye solution into the oils while stirring.
- Blend to trace: Use a stick blender to mix until the soap reaches trace, indicating proper emulsification.
- Cook the soap: Transfer the soap mixture to a slow cooker or double boiler, and cook it on low heat for 1-2 hours, stirring occasionally.
- Test for doneness: When the soap reaches a mashed potato-like consistency and has a neutral pH, it’s ready.
- Customize your soap: Add colors, scents, and other additives to the soap mixture.
- Spoon into molds: Carefully spoon the soap into your desired molds, tapping to remove air bubbles.
- Let it cool and harden: Allow the soap to cool and harden for 24-48 hours.
- Unmold and cut: Remove the soap from the molds and cut it into bars.
- Cure the soap: Place the soap bars on a rack in a well-ventilated area to cure for 1-2 weeks.
Choosing the Right Soap-Making Method For You
Factors to Consider when choosing:
- Personal preferences: Consider whether you prefer a smooth or rustic appearance and how much customization you want.
- Time commitment: Cold process soaps need longer curing times, while hot process soaps are ready sooner.
- Safety concerns: Both methods require lye handling, but hot process also involves heat, which may be a concern for some.
Tips for Beginners
- Start with cold process: It’s a good introduction to soap making and allows for more creative options.
- Research and learn: Study various recipes, watch tutorials, and read books to understand the process.
- Take a class: Local workshops can provide hands-on experience and guidance from experienced soap makers.
Experimenting with Both Methods
To find the best soap-making method for you, try experimenting with both cold and hot process techniques.
This will help you understand the differences and determine which method aligns with your preferences and needs.
As you gain experience, you’ll develop your own unique soap-making style.
Is Cold Process or Hot Process Soap Making Safer?
Both cold process and hot process soap making methods involve handling lye (sodium hydroxide), a caustic substance that can cause burns and eye damage if not handled correctly.
Cold process soap making is generally considered safer due to the lack of added heat, but both methods require proper safety precautions. Ultimately, it’s crucial to follow best practices, research, and learn from experienced soap makers to ensure a safe and enjoyable soap-making experience.
Consequently, safety precautions are essential for either method, including wearing gloves, goggles, and long sleeves, as well as working in a well-ventilated area.
However, there are some differences in safety concerns between the two methods.
Cold process soap making relies on the natural heat generated during the saponification process, which doesn’t require additional heating (depending on the oils you are using). As a result, there is a lower risk of burns from hot surfaces, making cold process soap making somewhat safer than hot process soap making.
In hot process soap making, the soap mixture is cooked in a slow cooker or double boiler to speed up the saponification process. This added heat can pose an increased risk of burns and accidents if not managed carefully. However, the hot process method typically reaches a neutral pH faster, reducing the time lye remains active in the soap mixture.
Frequently Asked Questions
Cold process soaps tend to be gentler and more moisturizing, making them suitable for sensitive skin. However, both methods can create soaps with skin-friendly ingredients if chosen carefully.
Common ingredients include oils (such as olive, coconut, and palm oil), lye solution (a mixture of sodium hydroxide and water), and additives like essential oils, colorants, and exfoliants.
Most equipment, like scales, thermometers, stick blenders, and soap molds, can be used for both methods. However, hot process soap making also requires a slow cooker or double boiler.
Both methods involve handling lye, which can be dangerous if not done with caution. Hot process soap making adds the element of heat, which may be a concern for some individuals.
Yes, you can create vegan soap using either cold process or hot process methods by choosing plant-based oils and avoiding animal-derived ingredients.
Yes, you can use fragrance oils in place of essential oils. However, be cautious with the amount used, as some fragrance oils can be stronger and may cause skin irritation.
Yes, you can add natural ingredients to your soap for added texture, color, and skin benefits. Be sure to research the proper usage rates and consider how the additives might affect the final product.
Conclusion
In conclusion, both cold process and hot process soap making methods have their own unique advantages and drawbacks, with each offering distinct creative opportunities, curing times, and safety considerations. Choosing between these two popular methods ultimately depends on your personal preferences, desired soap characteristics, and the amount of time you’re willing to invest in the soap-making process.
When you understand the key differences, advantages, and disadvantages of each method, you can make an informed decision that aligns with your needs and goals as a soap maker. Remember to follow safety precautions, experiment with various recipes, and learn from experienced soap makers to ensure a successful and enjoyable soap-making journey.