One essential step in the cold process soap making journey is cutting your soap into bars, and knowing when and how to do so can make all the difference in achieving professional-looking results. In this guide, we’ll explore when to cut cold process soap and tips for doing so.
Cut cold process soap 24-48 hours after pouring, as soon as it can be removed from the mold. The surface should appear dry and feel firm to the touch. If you see wet spots or signs of oiliness it is not ready yet, you should give it some more time before cutting.
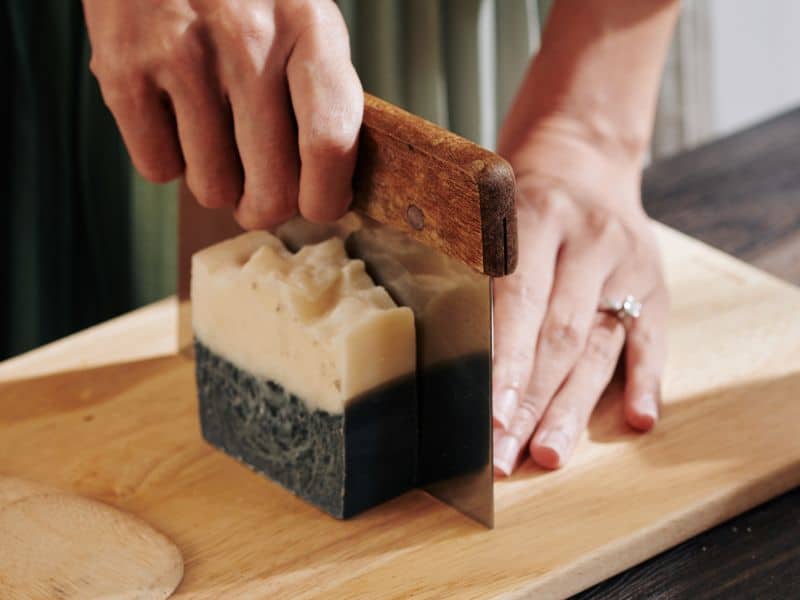
Once your cold process soap is ready for cutting, make sure to use the appropriate tools, such as a soap cutter, cutting board, and a ruler for even slices. Remember that practice makes perfect, so don’t be discouraged if your initial cuts aren’t flawless.
Experiment with various cutting techniques and designs to add creativity to your soap bars. As you gain experience, you’ll become more confident in knowing when your soap is ready to cut and how to achieve clean, professional-looking results.
Let’s take a closer look at some of the specifics related to cutting cold process soap below.
The Ideal Timeframe for Cutting Cold Process Soap
Recommended Waiting Period:
The ideal timeframe for cutting cold process soap is typically 24-48 hours after pouring it into the mold. This waiting period allows the soap to harden and become firm enough for cutting. However, the exact time depends on factors like the recipe, temperature, and humidity.
Factors Affecting Curing Time:
- Recipe: Different soap recipes have varying ratios of oils, lye, and water. Soaps with high water content may take longer to harden, while those with less water may firm up faster.
- Temperature: Curing time can be affected by the temperature at which the soap is stored. Cooler temperatures may cause the soap to harden more quickly, while warmer temperatures may slow down the process.
- Humidity: High humidity levels can prolong the soap’s curing time. In such cases, using a dehumidifier or placing the soap in a dry area can help speed up the process.
Signs Your Soap is Ready to Cut
Firmness and Texture:
When your cold process soap is ready to cut, it should feel firm to the touch. Press your finger lightly on the surface; if it leaves a small indent, it’s time to cut.
If the soap is too soft, wait a few more hours before trying again.
Surface Appearance:
Examine the surface of your soap for any signs of oiliness or wet spots. If the soap appears dry and has an even texture, it’s likely ready to cut.
However, if you notice any wet or oily areas, give the soap more time to cure.
Soap pH Level:
- Checking the soap’s pH level is an optional step, but it can help ensure your soap is safe to use. A pH test strip can help determine the soap’s acidity or alkalinity. A pH level between 8 and 10 indicates that the soap is safe to use and ready to cut. If the pH is higher than 10, the soap may still be too harsh, and it’s best to let it cure for a longer period before cutting.
Tools and Techniques for Cutting Soap
Essential Cutting Tools:
- Soap Cutter: A soap cutter is a must-have tool for cutting cold process soap. There are two types of soap cutters: wire and knife cutters. Wire cutters provide clean, even slices, while knife cutters offer more control and versatility.
- Cutting Board: A cutting board provides a stable surface for cutting soap. Choose a non-slip, easy-to-clean board, preferably one dedicated to soap making.
- Ruler and Pencil: A ruler and pencil help ensure straight, even cuts. Measure and mark your soap bars before cutting to maintain uniform sizes.
Tips for Precise and Clean Cuts:
- Cut at a consistent angle: Hold the soap cutter at a consistent angle to achieve even and clean cuts. Keeping your hand steady is key.
- Make a single, smooth motion: When cutting, use one smooth, continuous motion to avoid jagged or uneven edges.
- Clean your cutter between cuts: Wipe off any soap residue from the cutter between each slice to ensure clean and smooth edges.
Mistakes to Avoid When Cutting Cold Process Soap
Cutting Too Early or Late:
Cutting soap too early can result in soft, mushy bars that crumble easily. On the other hand, cutting too late can cause the soap to become too hard, making it difficult to cut and potentially leading to cracked or broken bars.
Monitor your soap’s progress and use the signs mentioned earlier to determine the perfect time to cut.
Using Improper Tools:
Using the wrong tools, like a dull knife or a cutter not designed for soap, can result in uneven cuts or damaged soap bars.
Invest in quality soap cutting tools to achieve professional-looking results.
Rushing the Process:
Patience is crucial when it comes to cutting cold process soap. Rushing the process can lead to mistakes and poorly cut bars.
Take your time, follow the tips provided, and remember that practice makes perfect.
Troubleshooting Common Cutting Issues
Crumbly Soap Edges:
Crumbly soap edges can occur when the soap is too dry or cut too late. To prevent this, monitor your soap’s curing time and cut when it reaches the ideal firmness.
If you still encounter crumbly edges, try using a sharper cutter and applying a steady, even pressure while cutting.
Uneven Cuts:
Uneven cuts can result from using a dull cutter, inconsistent pressure, or not measuring and marking the soap before cutting.
Ensure your cutter is sharp, apply even pressure, and use a ruler and pencil to mark your soap for precise cuts.
Soap Sticking to the Knife:
Soap sticking to the knife can make cutting difficult and result in messy edges.
To avoid this, wipe your knife clean between cuts and consider lightly coating it with rubbing alcohol or mineral oil before cutting.
Creative Soap Cutting Ideas
Unique Shapes and Designs:
Experiment with different cutting techniques to create unique soap shapes and designs.
For example, try cutting soap diagonally, making wavy or zigzag cuts, or using cookie cutters to create fun shapes.
Adding Texture to Soap Bars:
Add visual interest and a tactile element to your soap by creating texture on the bars’ surface.
Use a fork, comb, or textured soap stamp to make patterns or designs on the soap before it fully hardens.
Layering and Embeds:
Enhance your cold process soap by incorporating layers or embeds. Create layers by pouring different colored or scented soap mixtures into the mold, allowing each layer to set before adding the next.
For embeds, place small soap shapes, dried flowers, or other decorative items into the soap mixture before it hardens. This technique adds depth and creativity to your soap bars.
Tips for Soap Cutting Safety
Soap cutting safety is an important aspect of the soap making process. Handling soap, especially during the cutting stage, can pose potential risks if not done correctly. By taking certain precautions and following safety guidelines, you can ensure a smooth and enjoyable soap making experience.
Always wear gloves while cutting soap
Freshly made cold process soap contains lye, which can be caustic and cause skin irritation. Wearing gloves protects your skin from coming into contact with any residual lye.
Choose the right tools for cutting your soap
Using a dedicated soap cutter, whether it’s a wire or knife cutter, can prevent accidents and ensure cleaner, more precise cuts. Regular kitchen knives may be too dull or not suitable for cutting soap, increasing the risk of slipping and causing injuries.
Use a stable, non-slip cutting board
A stable non-slip cutting board can provide a secure surface for cutting. This prevents the soap from moving around and reduces the risk of accidents. Additionally, make sure your work area is clean and clutter-free to avoid any distractions or obstacles that could lead to mishaps.
Always cut away from your body
Cut away from your body to prevent potential injuries. Be mindful of the pressure you apply while cutting, as excessive force can cause the cutter to slip.
Keep children and pets away
Keep children and pets away from your soap making workspace. They might accidentally touch the soap or knock over equipment, leading to accidents or injuries.
Frequently Asked Questions
Use a ruler and pencil to measure and mark the soap before cutting, and apply consistent pressure.
While possible, it’s better to use a dedicated soap cutter for cleaner, more precise cuts.
Try unique shapes, textured surfaces, or incorporate layers and embeds into your soap designs.
If your finger leaves an indent when lightly pressed, it’s ready. If it’s too soft or hard, wait or adjust conditions.
Uneven cuts may result from using a dull cutter, inconsistent pressure, or not measuring and marking the soap before cutting.
Yes, you can trim or reshape uneven soap bars using a soap cutter or a sharp knife.
If the soap is too hard, try warming it gently in a warm area or by using a heating pad.
Conclusion
In conclusion, it is important to know when to cut cold process soap. Mastering the art of cutting cold process soap is an essential skill for soap makers. By understanding the ideal timeframe, recognizing when your soap is ready to cut, and using proper tools and techniques, you can create beautifully crafted soap bars.
Don’t forget to troubleshoot common cutting issues and explore creative ideas to make your soap creations truly unique. With practice and patience, you’ll soon become an expert at cutting cold process soap and enjoy the satisfaction of creating stunning, handmade products for yourself and others.