This guide is your companion for crafting homemade soaps on your stove. We’ll explore the essentials, from understanding the science behind soap making, to gathering the right materials, and selecting your ingredients.
We’ll take a detailed look at the crucial role heat plays in the process, and how your stove and cookware become important tools. Safety will be our top priority, alongside creativity. Whether you’re a beginner or an experienced soap maker, there’s something for you to learn and enjoy.
Understanding Hot Process Soap Making
Soap making is an art with many methods. Two of the main ones are hot and cold process. Both create lovely soaps, but they’re different.
Cold process soap involves mixing lye and oils. This mixture then saponifies, or turns into soap. But this takes time. It needs weeks to cure and harden.
Hot process, on the other hand, speeds this up. It involves cooking the soap after mixing. This forces the saponification to finish. The soap is ready within hours.
Benefits of Hot Process
Hot process soap has many benefits. One of the biggest is time. It’s ready fast. You don’t need to wait weeks to use it. This is great if you’re impatient or in a hurry.
Another benefit is the flexibility. In hot process soap, you can add extras at the end. These can be herbs, colors, or scents. They mix in easily. This isn’t always true with cold process soap.
How Hot Process Improves Creativity
Hot process soap is great for creativity. Because you can add extras at the end, you have more control. You can make the soap exactly how you want it.
You can try different color patterns. You can experiment with scents. You can add fun textures with herbs or grains. The possibilities are endless. Hot process soap lets you express your creative side. It’s more than soap. It’s a piece of art.
Making Hot Process Soap: Step-by-Step
Gathering Materials for Soap Making
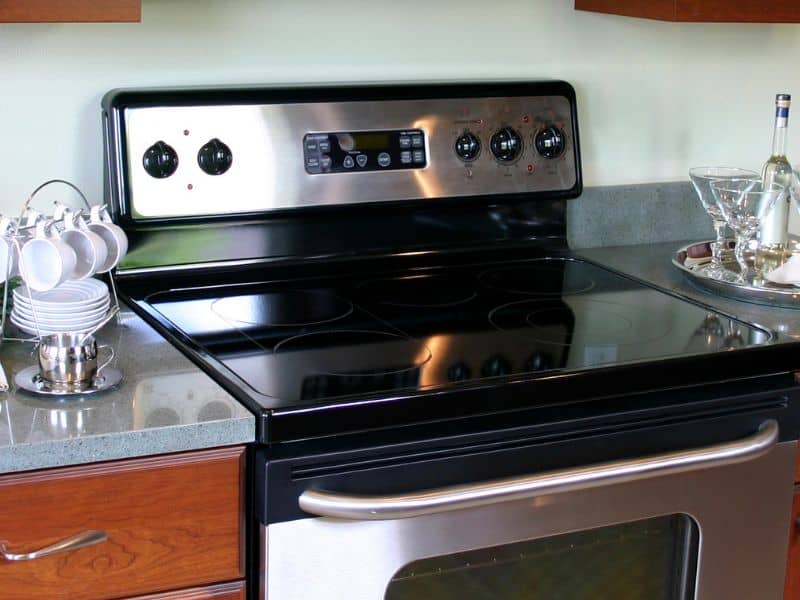
Making soap requires some tools. You’ll need soap molds. These can be silicone or wooden. You also need a stainless-steel pot. This pot should only be for soap. Don’t use it for cooking. A stick blender helps mix the soap. It makes the process easier. A stove is, of course, vital for hot process soap.
Safety is important in soap making. Lye can be dangerous. Always wear gloves to protect your hands. Use goggles to shield your eyes. Wear an apron to protect your clothes. Remember, safety first!
A clean workspace is a safe workspace. Clear a space on your counter. Make sure it’s clean and dry. Keep all your tools within reach. Organize your ingredients. This makes the process smoother.
Choosing Ingredients for Your Soap
The basic ingredients for soap are simple. You need lye, water, and fats or oils. Lye and water create a strong alkali solution. This reacts with the fats or oils. The result is soap.
Fats and oils give soap its character. You can use coconut oil for a bubbly lather. Olive oil makes the soap gentle and mild. Palm oil gives hardness to the soap. Each oil adds something unique. Experiment to find your perfect blend.
Extras make your soap special. You can add colors with micas or natural colorants. Scents come from essential oils. Exfoliants can be oats, coffee grounds, or seeds. These make your soap more than just soap. They make it a treat.
Working Safely with Lye
Lye, or sodium hydroxide, is key to soap making. It’s a strong alkali. It reacts with fats to create soap. But lye is dangerous. It can burn skin and eyes. It’s important to understand and respect it.
Always wear gloves and goggles when handling lye. Mix it in a well-ventilated area. Always add lye to water, not the other way around. This can cause a violent reaction. When you’re done, store lye safely.
Lye and the Saponification Process
Saponification is the process of making soap. It happens when lye and fats react. This reaction creates soap and glycerin. Heat speeds up this reaction. That’s why we cook hot process soap. It makes the saponification finish quickly.
Soap Making: Step-by-Step
Start by preparing your ingredients. Measure them carefully. Accuracy is key in soap making. Use a digital scale for this. Mix your lye and water in a well-ventilated place. It will heat up and fume. Melt your fats or oils on the stove.
Follow these steps for the saponification process, including the preparation of lye water and the addition of fragrance and dye:
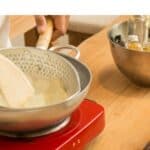
- Start by preparing your lye solution. Measure the lye and water separately. In a well-ventilated area, slowly pour the lye into the water (not the other way around), stirring gently until it’s fully dissolved. This reaction will cause the mixture to heat up rapidly, often exceeding 200°F. Allow this mixture to cool down to about 110°F.
- Set up your double boiler while the lye solution is cooling. Fill a large pot about one-fourth full with water. Place a smaller stainless-steel pot inside. This will provide gentle, indirect heat for soap making.
- Pour your pre-measured and melted oils into the smaller pot of the double boiler. These oils should also be around 110°F, similar to the lye water. Once both are at the right temperature, slowly add the lye water into the oils, stirring well with a long-handled spoon.
- Use a stick blender after the initial stirring. Blend in short bursts until the mixture reaches “trace”, a state where it resembles thin pudding, indicating that the oils and lye water are combined.
- Now, it’s time to start cooking. Set your stove to a low heat, aiming to maintain the soap mixture around 160°F to 170°F. This gentle heat will cook the soap in the double boiler. Stir occasionally to prevent the soap from sticking to the pot.
- During cooking, the soap will change, bubbling and growing. This is the saponification process. After about an hour, the soap should be ready. To test, take a small amount and touch it to your tongue. If it ‘zaps’ like a battery, it needs more cooking. If it tastes like soap, it’s done.
- Once the soap is fully cooked, turn off the heat. Now it’s time to add your fragrance and dye. Stir in your chosen essential oils for fragrance and soap dyes or natural colorants for color. Mix well to ensure an even distribution.
Remember to prioritize safety. Wear protective gear when handling lye and hot soap mixture. Soap making can be a fun and rewarding process when done carefully.
Molding and Curing
After cooking, your soap is ready to mold. Add any extras first. Stir them in well. Then pour the soap into your mold. Be careful. It’s hot and can still burn. Let the soap cool and harden. This can take a few hours or overnight. Once hard, you can remove it from the mold.
Adding Extras and Finishing Touches
Extras make your soap special. You can add them just before molding. Try colors, scents, or textures. You can also add extras to the top. Sprinkle on some oats or seeds. Or add a swirl of color. These finishing touches make your soap unique. They turn it into a work of art.
Utilizing Your Stove for Soap Making
Understanding the Role of Heat in Soap Making
Heat is a key actor in soap making. It aids in the combination of lye and oils, and accelerates saponification, the reaction that forms soap. A firm grasp on how heat impacts these processes can lead to improved soap making skills.
Selecting the Right Pots and Pans
Your choice of cookware is crucial for soap making. Look for heat-resistant and lye-safe materials. Stainless steel is an excellent choice due to its durability and heat conduction. Avoid using aluminum or non-stick pans as they can react with lye and ruin your soap.
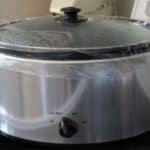
Setting Up a Double Boiler on Your Stove
The double boiler is an essential tool for soap making, as it prevents overheating and burning of the soap. To set up a double boiler, fill a large pot with several inches of water. Place a smaller pot inside it. The smaller pot, containing your soap mixture, is heated evenly by the steam from the boiling water.
Safety Tips for Using the Stove
Prioritize safety when using the stove. Keep your cooking area clean and free of clutter. Never leave the stove unattended when heating your soap mixture. Use oven mitts or pot holders to handle hot pots. Keep a fire extinguisher within reach as a precaution.
Cleaning and Maintenance Tips for Your Cookware
Clean your pots and pans promptly after use. Rinse thoroughly to remove any soap residue. If needed, scrub with dish soap and a non-abrasive sponge. Dry them immediately to prevent rusting. Proper care ensures your tools last longer.
Mastering the Art of Soap Making
Improvement comes with practice. Experiment with a variety of recipes. Maintain a soap making journal to record observations and results. Learn from any mistakes. Consider joining a soap making community for shared knowledge and tips.
Encountering problems is part of the learning curve. If your soap didn’t set, you might have used too much lye. If it’s too soft, you likely used excess oil. Most issues can be fixed or avoided in future batches with a little research and guidance.
Exploring different recipes is part of the fun and learning in soap making. Experiment with varying types of oils for different skin benefits. Try diverse scents using essential oils. Each batch of soap is an opportunity to express your creativity and produce something uniquely yours.
Frequently Asked Questions
You should use heat-resistant and lye-safe pots and pans. Stainless steel is a great choice. Avoid using aluminum or non-stick pans, as they can react with the lye.
Always wear protective gear like gloves and goggles when making soap. Be careful when handling lye and hot soap mix. Keep your work area clean and free of clutter. Never leave your stove unattended when heating the soap mix.
The hot process soap making method can take a few hours. This includes preparing your ingredients, cooking the soap, and letting it cool. But remember, safety and fun are more important than speed!
Clean your pots and pans right after using them. Rinse them well to remove any soap residue. If needed, scrub them with dish soap. Dry them right away to prevent rust. Proper cleaning helps your tools last longer.
Conclusion
In conclusion, you’re now ready to start the fun journey of making hot process soap on your stove. This guide has given you all the important information, from how heat helps make soap, to picking the right pots and pans, and fixing common soap making problems.
Don’t forget, every step, even the little mistakes, helps you learn. As you try out different soap recipes and methods, you’ll get better and better. Always remember to be safe, but also have fun and be creative with your soaps.
Now, it’s time to roll up your sleeves, turn on the stove, and start making your own special soaps.