As a soap maker, you want your creations to stay clean, fragrant, and visually appealing. One crucial aspect of maintaining these qualities is knowing when and how to wrap your melt and pour soap and the ideal time to do it.
Wrap melt and pour soap immediately after you cut it and it has fully hardened. Wrapping preserves fragrance protects from contaminants, and enhances presentation. Wrapping melt and pour soap also protects it from moisture in the air.
If the soap isn’t wrapped and comes into contact with moisture, it can start to dissolve because of its high glycerin content. Cellophane is the most common material used for wrapping melt and pour soap. You can also wrap it in wax paper or even use plastic bags. Whatever type of wrapping you choose, make sure that your product is fully sealed.
Benefits of Wrapping Melt and Pour Soap
Protects from Dust and Dirt
Wrapping your melt and pour soap helps shield it from dust, dirt, and other contaminants. This is important to maintain cleanliness and ensure your soap remains hygienic for users.
Properly wrapped soap also reduces the risk of unwanted particles being embedded in the soap’s surface, which could affect its appearance and quality.
Preserves Fragrance and Freshness
One key advantage of wrapping your soap is that it helps preserve the fragrance and freshness. Melt and pour soap often contains essential oils and fragrances that can evaporate over time.
By wrapping the soap, you create a barrier that slows down the evaporation process, keeping the aroma intact for a longer period. This helps ensure that the soap smells great and retains its intended scent until it’s used.
Enhances Presentation and Gifting
Wrapping your melt and pour soap not only has practical benefits but also adds an aesthetic touch. A well-wrapped soap looks more professional, making it more appealing for display or sale.
Additionally, wrapped soap is an excellent option for gifting, as the packaging adds a thoughtful, personalized touch.
You can customize the wrapping with colors, patterns, or themes to suit various occasions, such as holidays, birthdays, or weddings. By enhancing the presentation of your melt and pour soap, you create a more enjoyable and memorable experience for the end user.
Ideal Time to Wrap Your Soap
Cooling Period After Pouring
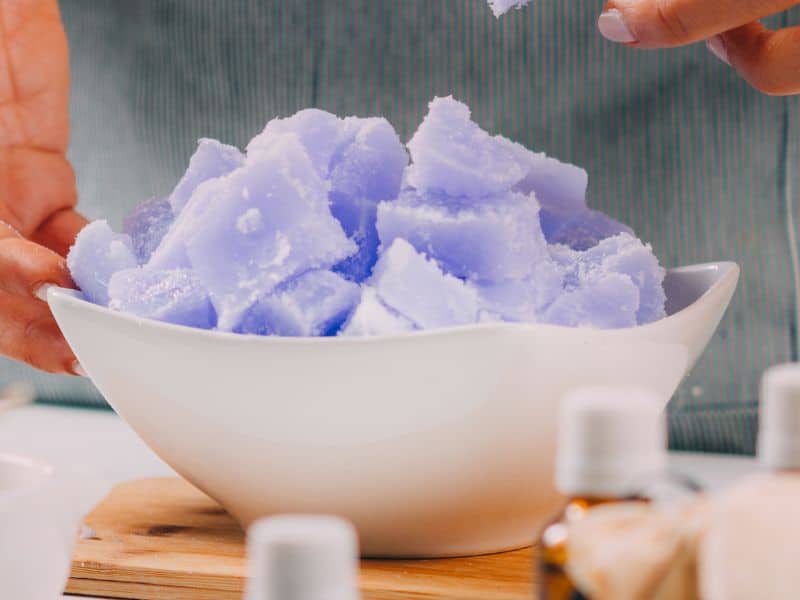
After pouring your melt and pour soap into a mold, allow it to cool and harden completely. This usually takes a few hours, depending on the size and thickness of your soap.
Wrapping the soap too soon may cause condensation or damage its shape, so it’s essential to wait until it’s fully cooled.
Firmness Test
To ensure your soap is ready to be wrapped, perform a firmness test. Gently press your finger on the surface of the soap.
If it feels firm and doesn’t leave an indentation, it’s ready to be wrapped. If the soap is still soft, give it more time to harden before proceeding.
Cutting and Handling
After the cooling period and firmness test, remove the soap from the mold and cut it into desired shapes or sizes.
Make sure your hands are clean when handling the soap to avoid transferring dirt or oils. Once the soap is cut and ready, you can begin wrapping each piece.
Choosing the Right Wrapping Material
Plastic Wrap Options
Plastic wrap is a popular choice for wrapping melt and pour soap because it’s clear, allowing the soap’s design to show through. It also forms a tight seal to keep out contaminants and preserve fragrance.
Choose a food-grade plastic wrap for the best results.
Wax or Parchment Paper
Wax or parchment paper is another excellent option for wrapping soap. These materials create a moisture barrier and are easy to work with. They can be folded and taped to create a simple, elegant package.
Wax or parchment paper is also available in various colors and patterns for added customization.
Eco-Friendly Alternatives
If you’re looking for environmentally friendly wrapping options, consider using reusable fabric, such as muslin or cotton cloth. These materials are washable, reusable, and biodegradable. A
Another eco-friendly option is using plant-based, compostable plastic wraps. By choosing sustainable wrapping materials, you can create a beautiful presentation while reducing your environmental impact.
How To Wrap Melt and Pour Soap Step By Step
Step 1: Remove Soap from Molds and Cut
Carefully remove the soap from the mold and cut it into desired shapes or sizes using a clean, sharp knife. Ensure your hands are clean to avoid transferring dirt or oils to the soap.
Step 2: Cut Wrapping Material
Measure and cut your chosen wrapping material to size. The material should be large enough to cover the entire soap, with extra space for folding and sealing.
Step 3: Place Soap on Wrapping Material
Place the soap in the center of the wrapping material. Ensure that the material is clean and free of any contaminants.
Step 4: Fold and Seal Wrapping Material
Fold the wrapping material over the soap, making sure it covers the soap completely. For plastic wrap, stretch it tightly around the soap to create a tight seal. For wax or parchment paper, fold the edges neatly and secure them with tape.
Step 5: Add Decorative Elements (Optional)
If desired, add decorative twists and bows to your wrapped soap using ribbons or strings. You can also create custom labels or tags with your brand name, logo, or message, and attach them to the wrapped soap using adhesive, ribbon, or string.
Step 6: Store Wrapped Soap Properly
Store your wrapped soap in a cool, dry place away from direct sunlight. The ideal storage temperature is between 50-70°F (10-21°C), with a humidity level below 60%.
Following these steps will hep you wrap and store your melt and pour soap effectively, ensuring it stays clean, fresh, and visually appealing for yourself, your customers, or as a thoughtful gift.
More Wrapping Techniques for Melt and Pour Soap
You have several options for how you wrap your melt and pour soap.
Simple Fold and Tape Method
The fold and tape method is an easy way to wrap your soap. Cut a piece of wrapping material large enough to cover the soap completely. Place the soap in the center, fold the material over it, and secure the edges with tape.
This technique creates a simple, clean package that protects the soap and showcases its design.
Decorative Twists and Bows
For a more elegant look, try adding decorative twists and bows to your wrapped soap. Cut a longer piece of wrapping material and twist the ends, then secure them with a ribbon or string.
This technique adds flair to your soap packaging and makes it perfect for gifting or display.
Custom Labels and Tags
Adding custom labels or tags to your wrapped soap is a great way to personalize your product. Design a label with your brand name, logo, or a message. Print the labels on adhesive paper, and attach them to the wrapped soap.
Alternatively, create tags with a hole punch and attach them using a ribbon or string. This adds a professional touch and helps your soap stand out.
Storage and Display Tips
Ideal Temperature and Humidity
Store your wrapped melt and pour soap in a cool, dry place away from direct sunlight. The ideal temperature is between 50-70°F (10-21°C), with a humidity level below 60%.
This helps prevent the soap from melting or becoming too soft, ensuring it maintains its quality and appearance.
Shelf Life Considerations
Melt and pour soap has a shelf life of around 1-2 years, depending on the ingredients and storage conditions. Keep track of when your soap was made and try to use or sell it within this time frame to ensure optimal quality.
Organizing Soap Displays
When displaying your wrapped soap, organize it in an appealing and accessible way. Group similar colors, scents, or themes together.
Use shelves, baskets, or trays to create an organized and visually appealing display. The proper presentation will attract customers and make your soap more enjoyable to use.
Frequently Asked Questions
Wearing gloves when handling soap is a good practice to avoid transferring dirt or oils onto the soap, ensuring it remains clean and hygienic.
Organize soap displays by grouping similar colors, scents, or themes together and using shelves, baskets, or trays to create an organized and visually appealing presentation.
The fold and tape method involves cutting a piece of wrapping material large enough to cover the soap, folding it over the soap, and securing the edges with tape to create a simple, clean package.
Some popular wrapping materials include plastic wrap, wax, or parchment paper, and eco-friendly alternatives like reusable fabric or plant-based, compostable plastic wraps.
Conclusion
In conclusion, wrapping your melt and pour soap is an essential step in ensuring it remains clean, fresh, and visually appealing. By following the guidelines outlined in this article, you’ll know when to wrap your soap, how to choose the best wrapping materials, and various techniques to create an attractive presentation.
In addition, by implementing proper storage and display tips, you can prolong your soap’s shelf life and create an organized, eye-catching display. With these insights in mind, you’ll be able to enhance your soap making technique and create beautiful, high-quality products that you and your customers will love.