Hot process soap making is a popular choice among hobbyists and professionals alike. Why? Well, it’s simple. This method uses heat to speed up the soap’s saponification process. The result? You get usable soap much faster compared to cold process soap making.
Hot process soap also has a rustic, handmade appeal. It’s perfect for those who love the charm of homemade crafts.
Now, let’s talk about the fun part: coloring your hot process soap.
Equipment and Supplies for Coloring Hot Process Soap
Crafting colorful hot process soap starts with gathering the right materials. Here’s what you’ll need:
- Soap Base: There are various types of soap bases available. Many prefer a natural base like olive oil, coconut oil, or shea butter.
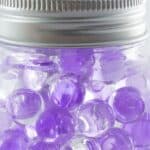
- Soap Colorants: These come in different forms. Liquid dyes, mica powders, and natural colorants like clays or spices. Choose according to the desired effect.
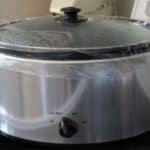
- Crockpot or Double Boiler: This is where you’ll cook your soap. It should be large enough to hold and heat your soap base.
- Safety Gear: Safety first! You’ll need gloves and goggles to protect your skin and eyes.
- Soap Mold: After cooking and coloring, the soap will need to set in a mold. Silicone molds work great.
- Stick Blender: This helps mix your ingredients thoroughly.
- Spatula: Essential for stirring and scraping soap from the sides of your pot.
- Thermometer: It’s crucial to monitor your soap’s temperature during the process.
Remember, using quality tools and ingredients can make a big difference in your soap’s final look and feel.
Understanding Soap Colorants
Before we dive into the step-by-step guide, let’s talk more about colorants. Understanding your options can help you create vibrant, stunning soaps.
Colorants can be divided into three main categories:
- Liquid Dyes: These are easy to use and blend well. They provide bright, clear colors.
- Mica Powders: Mica gives a shimmering effect to your soap. It’s available in many colors.
- Natural Colorants: If you prefer a more natural approach, consider these. They include spices, clays, and plant-based options. But remember, natural doesn’t always mean safer. Some natural colorants can be irritating.
When choosing colorants, consider the final color you want. But also think about safety and skin sensitivity. Always do a patch test when trying new colorants.
Step-by-Step Guide: Coloring Hot Process Soap
Now that we’ve covered the basics, let’s dive into the steps of coloring hot process soap.
Step 1: Preparing Your Soap Base
Before you begin, chop your soap base into small chunks. The smaller they are, the faster they will melt. Put these chunks into your crockpot or double boiler. Turn on the heat to a low setting. Be patient and let the soap base melt slowly to prevent burning.
Step 2: Adding the Lye Solution
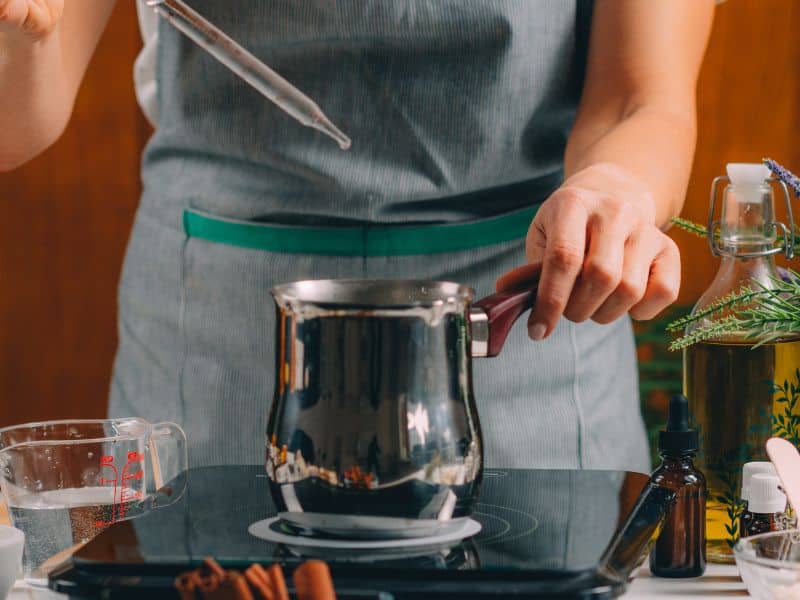
While your soap base is melting, it’s time to prepare your lye solution. Lye, or sodium hydroxide, is essential for soap making. It reacts with the fats in your soap base to create soap.
To make your lye solution, carefully add the lye to water (never the other way around!). This will cause a chemical reaction, generating heat and fumes. Always do this in a well-ventilated area and wear your safety gear.
Once the lye solution cools to around 120-130°F, slowly add it to your melted soap base, stirring well.
Step 3: Cooking Your Soap
Cover your crockpot and let the soap cook. It will gradually become waxy, then gel-like. This is the saponification process at work.
Remember to check your soap every 15 minutes, stirring it gently each time. The process usually takes about an hour.
Step 4: Adding Your Colorants
Once your soap reaches the “mashed potato” stage, it’s time to add color.
If you’re using liquid dye or mica powder, blend it into a small portion of soap first. This prevents clumps. Then, add this colored soap back into the main batch and mix well.
If you’re using natural colorants, add them directly to the pot. Stir well to distribute the color evenly.
Step 5: Molding Your Soap
After adding your colorants, spoon your soap into the mold. Be careful, the soap will still be hot. Press it down to remove any air bubbles and to ensure it fills the corners.
Step 6: Curing Your Soap
Finally, allow your soap to cool and harden. This usually takes 24 hours. After that, you can remove the soap from the mold.
For best results, let your soap cure for an additional 1-2 weeks. This allows excess water to evaporate, making the soap harder and longer-lasting.
That’s it! You’ve successfully colored your hot process soap. Remember, practice makes perfect. So don’t worry if your first few batches aren’t perfect. Keep trying, and you’ll soon be creating beautiful, colorful soaps!
In the next section, we’ll explore some tips and tricks to help you perfect your soap coloring skills.
Tips and Tricks for Perfectly Colored Hot Process Soap
With the basics down, let’s explore some pro tips. These can help you create even more beautiful hot process soaps.
- Experiment with Colors: Don’t limit yourself. Try different colorants and combinations. Remember, the color of your soap base can affect the final color.
- Start Small: Especially when you’re starting out. Begin with a small amount of colorant. You can always add more, but you can’t take it away.
- Watch Your Temperatures: Too much heat can alter your colorants. Keep an eye on the temperature when adding your colors.
- Use a Color Wheel: This can help you understand how colors work together. Use it to create stunning color combos in your soap.
- Test, Test, Test: Different colorants react differently. Always test new colorants in small batches before using them in full-sized soaps.
- Remember the Trace: “Trace” is a soap making term. It refers to the point when oils and lye water have emulsified. At “thin trace,” the soap is still fluid, perfect for swirling colors.
Troubleshooting Common Issues in Soap Coloring
Even seasoned soap makers face issues. Let’s look at some common problems and how to fix them.
- Speckled Soap: This can occur when colorants aren’t mixed in properly. To fix this, make sure to mix your colorants thoroughly.
- Color Morphing: Some colors can change in soap due to pH levels. Test your colorants first to avoid surprises.
- Faded Colors: Some colorants can fade over time, especially in sunlight. Use stable colorants or keep your soaps out of direct light.
Frequently Asked Questions
You can use liquid dyes, mica powders, or natural colorants. Each type has its pros and cons, so choose based on your desired outcome.
While technically possible, food coloring is not recommended. It’s not stable in soap and can fade or change colors over time.
Start with a small amount and add more until you achieve your desired color. The exact amount depends on the type of colorant and your personal preference.
The “mashed potato” stage refers to the point when the soap mixture has a thick, gloopy consistency similar to mashed potatoes. This is when you add your colorants.
Some colorants can fade over time, especially in sunlight. Use stable colorants, and store your soaps out of direct light to prevent fading.
Conclusion
In conclusion, coloring hot process soap is a unique blend of science and art. It’s a creative way to add a personal touch to your homemade soaps. From understanding your colorants to mastering the hot process soap method, each step is a learning experience.
Don’t be discouraged by initial challenges. Experiment with different colors, try new techniques, and always prioritize safety. Remember, each batch is a step towards refining your soap-making skills.