This comprehensive guide will walk you through the making, mixing, and aroma bead curing process from start to finish, covering everything from the essential supplies you’ll need to the soaking and curing process, adding color, and even troubleshooting common issues.
Cure aroma beads by leaving them closed up in their container for 7-10 days after they are no longer sticky and appear to be dry. When all of the fragrance has been absorbed is when the curing process starts. This will give your aroma beads a better longer-lasting scent.
During the curing process, the fragrance oil continues to permeate the beads, enhancing the depth and longevity of the scent. It’s essential not to rush this phase, as it greatly impacts the final product’s quality.
After the curing period, your aroma beads are ready to be used. Whether placed in small sachets in your car, in a decorative bowl at home, or used in any other creative way, these potent beads will fill your space with a delightful fragrance for an extended period.
Let’s take a closer look at how to prepare and cure aroma beads below.
Essential Supplies for Aroma Bead Making
High-quality Aroma Beads
Embarking on the journey of creating aroma beads starts with procuring the right materials. It is crucial to use high-quality aroma beads. These beads serve as the base for your creation and directly influence the outcome in terms of scent intensity and longevity.
Look for beads that are uniformly sized for even absorption of the fragrance oil.
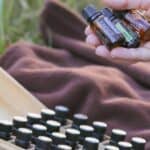
Concentrated Fragrance Oils
Your chosen scent will bring your aroma beads to life. Concentrated fragrance oils provide a potent and long-lasting aroma.
Be adventurous and explore the wide array of available fragrances, from calming lavender to invigorating citrus notes, the possibilities are endless.
Digital Scale
Precision is key when preparing your aroma beads. A digital scale ensures accurate measurements of your beads and fragrance oils.
The right ratio is essential for achieving the perfect balance of scent and texture in your final product.
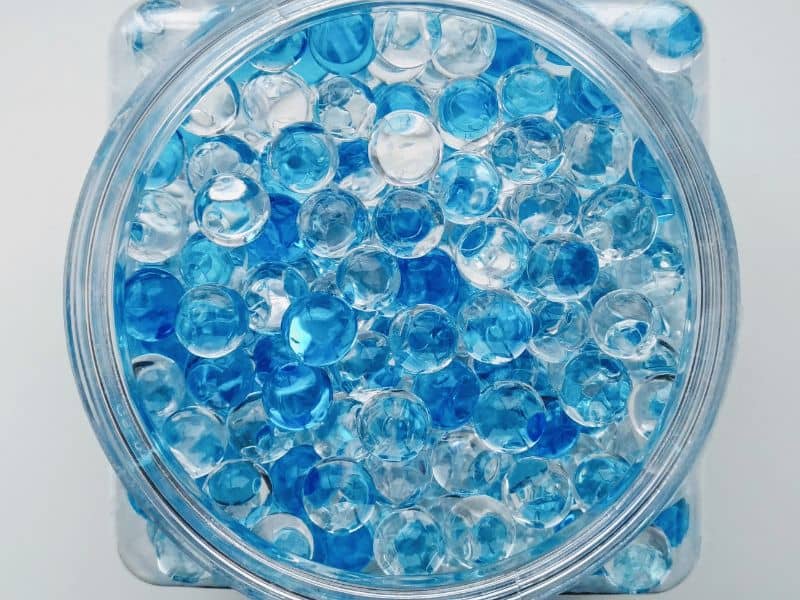
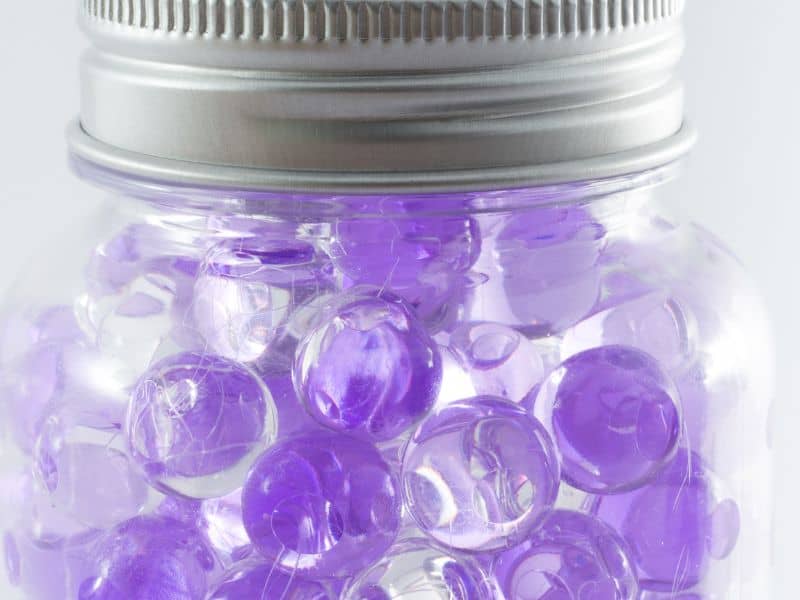
Glass Mason Jars with Lids
For soaking and curing your aroma beads, a glass mason jar with a secure lid is ideal. Glass is non-reactive, meaning it won’t interfere with the fragrance oil’s composition or scent.
Furthermore, the jar’s transparency allows you to monitor the soaking process easily.
Pigments or Mica Powders for Coloring
Visual appeal is another essential aspect of creating aroma beads. Pigments or mica powders allow you to infuse your beads with vibrant colors.
These can be matched with the scent or theme you’re aiming for. For example, use green for a fresh pine scent or red for a bold cinnamon fragrance.
Additional Tools
A few additional tools can enhance your bead making process. A sturdy spoon or spatula is useful for stirring your mixture. Disposable gloves can keep your hands clean and safe from concentrated oils.
A funnel can assist in transferring your finished beads into their final containers or sachets.
Preparing Aroma Beads
Choosing the perfect fragrance oil for your aroma beads is a personal and creative decision. Consider the ambiance you wish to create. Do you want a calming atmosphere? Go for soothing scents like lavender or chamomile. For a refreshing and invigorating aroma, opt for citrus or minty fragrances.
As mentioned, a digital scale is your best friend when it comes to measuring your materials. Keep a ratio of 8:2 in mind — that is, 8 ounces of aroma beads to 2 ounces of fragrance oil. This ratio ensures a strong scent without oversaturating your beads.
Once you’ve measured your aroma beads and fragrance oil, combine them in your glass mason jar. Seal the jar and give it a good shake to distribute the oil evenly across the beads. Remember to shake the jar every few hours for the best results.
This consistent mixing helps all beads get an equal chance to absorb the fragrant oil, leading to a uniform scent distribution in your final product.
The Soaking Process: Infusing Fragrance into the Beads
Proper Bead-to-Oil Ratios
Maintaining the correct bead-to-oil ratio is paramount in the soaking process.
The recommended ratio for aroma beads to fragrance oil is 8:2 by weight. This means for every 8 ounces of aroma beads, you should use 2 ounces of fragrance oil. Always ensure to mix well for even absorption.
As previously mentioned, the optimal ratio is 8:2 (8 ounces of beads to 2 ounces of fragrance oil). This balance ensures your beads are saturated enough to deliver a potent scent, but not so saturated that they become overly oily or take an extended time to cure.
Using too much oil is a common mistake for beginners. If you use too much oil it can cause problems getting the oil to absorb. If your beads are not soaking up the oil, we have a solution.
If aroma beads aren’t absorbing the fragrance oil, try adding more aroma beads to the container and shaking the mixture more often. In addition, warming it slightly can also help. If the issue persists, the oil may be too heavy, consider switching to a lighter oil.
Remember, not all fragrance oils behave the same way. Some might take longer to be absorbed due to their molecular structure. Patience is key in this process, and adjusting your methods based on the type of oil can lead to better results.
The Importance of Shaking the Jar
Shaking the jar during the soaking process is a crucial step. This action distributes the fragrance oil evenly among the beads, ensuring each bead is thoroughly infused with the scent.
It’s recommended to shake the jar every few hours, and to alternate the jar’s position each time, flipping it upside down to let gravity assist in the soaking process.
Tips for Speeding Up the Absorption Process
If you’re looking to speed up the aroma bead drying process, try this.
To make aroma beads dry faster, ensure they’re in a warm environment and shake them often. The warmth helps the oil to absorb quicker, while shaking distributes the oil evenly, speeding up the drying process.
Additionally, using lighter fragrance oils can also expedite the drying process as they tend to absorb faster into the beads. Remember, patience is key to achieving the best scented outcome.
Recognizing When the Soaking Process is Complete
Knowing when the soaking process is complete is essential. This typically occurs when the beads appear dry and no longer stick to the sides of the jar. The beads should be fully saturated with the fragrance oil, looking clear and glossy.
Curing Aroma Beads: Unlocking Their Full Potential
Curing is a crucial step that allows the aroma beads to reach their full potential. During this phase, the fragrance oil continues to bond with the bead material, leading to a stronger and more long-lasting scent. Skipping this step may result in a weaker fragrance that fades quickly.
For optimal results, it’s recommended to let your aroma beads cure for a minimum of 7 to 10 days. The longer you allow the beads to cure, the stronger and more enduring the scent will be. Patience in this stage will reward you with a superior final product.
Several factors can influence the curing time of your aroma beads. The type and concentration of your fragrance oil can impact the curing process, with some oils naturally taking longer to cure than others. Environmental factors, such as temperature and humidity, can also affect the curing time.
How to Tell if Your Beads are Fully Cured
Determining whether your beads are fully cured is relatively straightforward. Fully cured beads will be dry to the touch and won’t leave an oily residue. The fragrance should be strong and consistent. If your beads still feel oily or the scent isn’t as potent as you’d like, they may need more curing time.
Adding Color to Your Aroma Beads
Selecting the right pigments or mica powders can add a visual appeal to your aroma beads. These colorants are available in a broad spectrum of shades, allowing you to match the color with the fragrance or theme. It’s essential to choose colorants that are non-toxic and safe for use.
After your beads are cured, you can add color. Add a small amount of pigment or mica powder to the jar and shake until the color is evenly distributed.
Ensure the jar is tightly sealed to prevent any spills. The shaking technique used during the soaking process is also effective here, helping to evenly coat each bead with color.
Creating custom colors and effects can be a fun part of the process. You can blend different pigments or mica powders to achieve unique colors.
Try creating gradient effects by layering differently colored beads, or give your beads a sparkling effect by choosing mica powders with a shimmer finish.
Storing and Using Your Aroma Beads
Proper storage is essential to maintain the potency of your aroma beads. Store your finished beads in a sealed container in a cool, dry place. Exposure to heat or direct sunlight can cause the fragrance to dissipate faster.
Aroma beads can be displayed and used in a variety of ways. They’re great as car air fresheners when placed in small sachets. Use them in decorative bowls as home fragrance, or in small organza bags as closet or drawer fresheners. You can even incorporate them into crafts and homemade gifts!
If your beads are not absorbing the fragrance oil or the scent is not as strong as you’d like, there might be some issues to troubleshoot. It’s important to ensure that you’re using the correct ratio of beads to oil. If the scent isn’t strong enough, you might need to let the beads cure for a longer period. Always remember, patience and precision are key to creating perfect aroma beads.
Aroma Bead Troubleshooting
Addressing Uneven Color Distribution
Uneven color distribution can detract from the visual appeal of your aroma beads. If you notice this issue, try shaking the beads more vigorously or for a longer period. Also, ensure you’re using the right amount of pigment or mica powder – too much can lead to clumping and uneven color.
Resolving Issues with Beads not Absorbing Oil
If your beads aren’t absorbing the fragrance oil, it could be due to a few factors. Check your bead-to-oil ratio – using too much oil can saturate the beads and slow down the absorption process. Also, ensure you’re shaking the jar regularly to facilitate absorption.
Tips for Improving Scent Strength and Longevity
If your aroma beads aren’t as fragrant or long-lasting as you’d like, letting them cure for a longer period can help. Experiment with different curing times to find what works best. Additionally, storing the beads properly can significantly enhance their scent longevity.
Correcting Common Mistakes in the Preparation, Soaking, and Curing Process
Common mistakes include using the wrong bead-to-oil ratio, not shaking the jar often enough, and not allowing sufficient curing time. By paying close attention to these steps and following the recommended guidelines, you can improve the quality of your aroma beads.
Expert Aroma Bead Tips and Tricks
Maximizing Fragrance Strength and Longevity
To maximize fragrance strength and longevity, let your aroma beads cure for at least 7-10 days. The longer the beads cure, the more potent and long-lasting the scent will be. Also, remember to store your finished beads in a cool, dry place away from direct sunlight to preserve their scent.
Experimenting with Custom Scent Combinations
One of the joys of making aroma beads is the ability to experiment with custom scent combinations. Try blending different fragrance oils to create your unique scents. Start with a base note, add a middle note, and finish with a top note for a complex and pleasing aroma.
Ensuring Safety While Working with Aroma Beads
Safety should always be a top priority when working with aroma beads. Always work in a well-ventilated area and wear gloves when handling concentrated fragrance oils. Avoid contact with eyes, and keep your materials out of reach of children and pets. Finally, always clean up any spills promptly to prevent slips and falls.
Frequently Asked Questions
Aroma beads are made by soaking them in fragrance oil. The typical ratio is 8 ounces of beads to 2 ounces of oil. The mixture is then shaken periodically over several days until the beads have fully absorbed the oil.
Yes, you can color aroma beads using pigments or mica powders. This step is typically done after the beads are cured and can add a decorative touch to your beads.
Once aroma beads have fully released their scent, they cannot be reused. However, the beads are biodegradable and can be disposed of safely.
Conclusion
In conclusion, aroma beads are a versatile and delightful way to infuse your surroundings with your favorite scents. Making them at home not only allows for the personalization of fragrance and color but also gives you the satisfaction of creating something beautiful and functional.
Through this guide, we hope you’ve gained a thorough understanding of the process, from gathering your supplies to the final steps of curing and coloring your aroma beads. Troubleshooting tips and expert advice should help you navigate any challenges that may arise during your aroma bead making journey.
Remember, patience and creativity are key in this process. Whether you’re crafting these aromatic gems for your own use, as thoughtful gifts, or even as a part of a business venture, the time and effort invested will surely pay off when you catch the first whiff of your successfully made aroma beads.